And there are particularities that are seen from outside eyes.
Why do they smell? First of all, so that the misunderstandings of the koristuvach do not break anything, otherwise, they are needed in a number of cases and do not need to be vikorized regularly. Today we know about the engineering menu - a section for programmers, testers, geeks, of the confirmed koristuvachs and those who want to get into the “heart” of adjusting the gadget.
What is an engineering menu?
Talk about a special program or system section, Which developers are expected to compete at the final stage of configuring the software platform of the mobile device. I'll help you bring in the stench the rest of the changes on the robot, check the operation various sensors and complete testing of system components. Also, if you want to use the functionality of the service menu, you can use it to remove a large amount system information, carrying out various tests (about 25 pieces) and adjusting any Android settings- various sensors, mobile network, possessed and in.
Engineering, service or system menus are available on smartphones and tablets running on a MediaTek processor. On the Qualcomm chipset it is either disabled or out of date.
Respect! This section is intended for the verification of property owners, who generally represent the inheritance. Careless actions can lead to harm file system And display your smartphone in your best way.
How do I get to the engineering menu?
To go to engineering menu, in the add-on to dial a number you need to enter a special command: *#*#3646633#*#*. On some versions you can use the code *#*#4636#*#* or *#15963#*.
Since the code for the engineering menu on Android is not specified, and the phone does not have programs for dialing numbers (relevant for tablets, which do not support calls), you can use the MobileUncle Tools or MTK Engineering programs, which can be easily accessed through Google Play.
After entering the command or launching the program, the required section will open. You may want to close it immediately - you will need to have the “Retailer Mode” activated on your smartphone. To do this, go to the gadget setup, find the kernel version there and press it quickly 5-10 times.
Functions of the engineering menu
The engineering menu is divided into several categories, about the skin of which we can recognize.
- Telephony. Here you can find out everything that needs to be done mobile connection. For example, you can activate or turn on BandMode songs (frequencies for 2G/3G/4G), check the operation of SIM cards and turn on mobile data transfer in the background.
- Connectivity: configuration of Bluetooth, radio, Wi-Fi and Wi-Fi CTIA parameters. For example, in radio settings you can specify the radio type, antenna type (you need to use headphones) and sound format (mono or stereo). The radio will play directly from this section.
- Hardware Testing. In this section it is possible to adjust the operation of various components of the device, in simple words, the following: the equal sound of headphones and speakers, adjusting the sensitivity of the microphone, various camera parameters (photographer). ій, ISO adjustment, HDR, focusing and much more), touchscreen robot, sensors (calibration ) right there) and so differently. This category is already large and global, and the skin section requires extensive knowledge and skills.
- Roztashuvannya (Location). In this category you can monitor the GPS robot, see how many satellites have captured the gadget, and simply conduct a test.
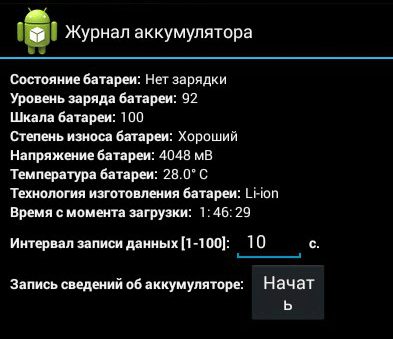
- Log and Debugging. This is where logs (logs) of batteries are kept (charge capacity, voltage, operating hours, temperature) and other low-voltage devices to a simple koristuvachevi functions.
- Others. To combine two also unknown cross-cortical functions.
Adjusting the engineering menu
The engineering menu offers great possibilities for customizing the phone, which we will look at in the report.
- SAR Test is a significant level of advantageous promotion of a smartphone or tablet.
- Connection – testing of available types dartless connection: Bluetooth, Wi-Fi, WLAN CTIA and FM receiver.

- Audio - adjusting the sound in speakers, microphones and headphones. How to increase the density of Android through the engineering menu.

- Camera – adjusting various camera parameters.

- Increasing the flow chamber - the indicator of the working flow of the chamber is displayed (for our tablet, set it to 2 mA).
- Navantastic CPU test ( central processor) - checking the stability of your robot, identifying problems with the processor-memory channel, testing the cooling and electrical systems of the processor.
- Device Manager – activation of automatic SMS registration, management of configuration parameters.
- Vimknennya - adjusting the frequency of the signal.
- Display - setting the cycle of the pulse width modulation display, which is applied to the brightness of the screen, which is compressed by the way of the switching on/off of the backlight; adjustment of the rear switch; vertical controller horizontal lines display.

- Sleep mode - this activation prevents the device from going into sleep mode.
- IO - management of data entry/display operations.
- Memory - reports information about the RAM module.
- At the stage - information about the battery is reported (the amazing name of the section, which covers everything, is explained by the additions when automatically transferring the name of the add-on, or the ability to switch to English language Vidsutnє).
- SD card test - the name of the tab speaks for itself.
- Touch screen - checking the sensitivity and reaction of the display under pressure, as well as installing additional settings.
- USB – testing robotic USB port.

- UART/USB switch - switching between two transmission modes.
- Sensor - calibration (adjustment of clarity and sensitivity) touch screen. Standard methods.
- Roztashuvannya - testing of robotic GPS and determination of precise roztashuvannya.
- Battery log - reports about the battery and the ability to activate the recording of reports about battery drain.
- MTKLogger - collection of system logs (MobileLog, ModemLog and NetworkLog).
- Temperature sensor - shows the battery and processor.
- Font parameter – change the font size.

Once the program is installed, certain functions may not be available without.
Xiaomi menu engineer
Regardless of the fact that our test Redmi 2 runs on a Qualcomm Snapdragon 410 processor, it also has some functionality that we need to know. To get to this point, you need to tap on the “Kernel version” item several times.

The menu is represented by five items:
- Automatic Test. Automatic test for all parameters of the device.
- Single Item Test. The skin should undergo 25 tests separately. About these we will report below.
- Test Report. Read about the completed texts and their results.
- SW add HW version. Information about the smartphone version, IMEI and other numbers.
- Device View. Tributes about owning a smartphone.

Apparently, the most important item is Single Item Test, where you can pass a large number of tests.

Let us immediately remember that in the apparatus that we tested, there was no way to adjust it - only to check the feasibility. At the end of the skin procedure, indicate its status: successful (success) or (failed).
- Key – usefulness of physical buttons. However, it was not possible to complete it successfully, and as soon as the power button was checked, the smartphone went off.
- Backlight – brightness of the display.

- TouchPanel. The touch screen test includes two procedures: Crossed calibration and Touch panel calibration. The first one checks the name “swipe”, the other one – one by one presses on the screen. A simple way to calibrate the display.

- TFlash. Testing the memory card with two results: either everything is fine, or the card is corrupted.
- Bluetooth. Search for available devices.
- SIM card. Test for the presence of SIM cards.

- Vibration. The gadget vibrates - everything is approx.
- RTC (Real Time Clock) - operation of a new year clock.
- Speaker. Testing of the power speaker. We didn’t understand how we were passing through. We'll be more specific if you tell us in the comments.
- Receiver. It shifts like a receiver, a master, and then music plays during the testing hour.
- Headset. Checking the 3.5 mm jack to detect headphones, sound and support buttons on the headset.

- LED. The indicator is clear, everything is obvious here.
- FM (Radio). If you can hear noise in the headphones, then everything is working properly.
- Camera. Everything is obvious: a test of the main and frontal optics, as well as the front optics.
- Battery. An informative section with information about the correct operation of the USB cable (charging), the state of the battery, its charge level and temperature. More similar data can be obtained.

- Wi-Fi. Identification of the closest access points. There is no adjustment.

- Torch (likhtarik): light/not light.
- The ring check is a test of the hand-held microphone. First it is stamped Recording, then Playing.
- LCD. Color the screen.
- GPS. Identification of available companions.
- Gyro (gyroscope). Three parameters – X, Y, Z – change depending on the position of the device in space.
- G-sensor (accelerometer). Spin the gadget in all directions and turn it over. Three parameters can be set to ok.
- Proximity Sensor (proximity sensor). Select the settings for the speaker and the settings so that the gadget screen turns off when you unwind, including the touch pads.
- Optical and Magnetic Sensor (optical and magnetic sensors) - points we have not understood, share your knowledge in the comments.
After passing all tests, you can go to the Test Report section. Apparently, our “little animal” is in a miraculous shape and has removed all the changes so that it can be quiet.

Visnovki
We have also redesigned the main sections of the engineering menu available on the devices we are testing. Now let’s take a look at what possibilities the koristuvach eliminates before installation:
- Format, restore to factory settings.
- Robot testing several elements smartphone or tablet, for example, sensors, sensitivity touch display and precision calibration.
- Reports about the device and its parts. For example, you can check the battery consumption from the moment of remaining charge and look at the statistics of vikorist programs.
- Optimization of energy consumption. As an option, unneeded frequency ranges are turned on. In Russia, the standard operating ranges for 2G and 3G are 900 and 1800 MHz, while the USA has 850 and 1900 MHz.
Not a lot of people know about using the Android OS menu with advanced settings for the device - engineering menu
. But who knows, but who doesn’t know how to get there and what to do with it.
This article will show you how to enter the engineer menu and what you can do.
You can enter the engineer menu simply by entering a special command (other than requiring you to add what Danish method does not apply to everyone Android versions and not on all devices)
Command to enter the engineer menu: *#*#3646633#*#*
You can also issue the command on some versions of Android *#15963#* і*#*#4636#*#*
Immediately after entering the command, you must enter and open the engineering menu. But on some devices you still need to press the Dzvink key
If this method, without sacrificing the results, you can quickly use an alternative!
And it depends on the installed programs (which are publicly available on Google Play). Mobileuncle MTK Tools 2.4.0"

This program gives access to the engineering menu (the procedure is similar to entering a combination.*#*#3646633#*#*)
There's no way to fix it! The scope for experiments is great! Practically EVERYTHING can be improved and regulated!
To be precise, let’s briefly look at the level of strength of the device:
Go to the program ---> select the "Engineer Mode" section


Because For us, we need to adjust the level of sound by selecting ---> "Audio"

And voila, a menu opens to click on us.

Max Vol – the same for all units, usually set to 150 (you can change 0-160 – this can be changed by selecting the Media item from the unit).
If in any submenu, for example, Audio – Normal – Sph the intensity level is not available for regulation, then go to another subsection, for example, Audio – Normal – Media – there it will be possible to adjust the intensity level.
Sub-items:
Sph – equal density during telephone calls,
Mic - equal to the sensitivity of the microphone,
Ring - the thickness of the ring,
Media – volume when playing music, movies, and games.
Ring tone levels are set in Audio - LoudSpeaker - Ring
Max Vol = 150
Rivni: 120130145160180200 (more wheezing starts)
Levels of volume in telephone dynamics in Audio - Normal - Sph
Max Vol = 150
Rivni: 100 120 130 135 140 145 150
Microphone volume levels Audio - Normal - Mic
Rivni: 100 172 172 172 172 172 172
Multimedia volume levels are set in Audio - LoudSpeaker - Media
Rivni: 110 130 160 190 210 230 250
All the same can be adjusted for the Headphone mode, by analogy:
Equal thickness of shipment according to big call set in Audio - LoudSpeaker - Sph
Max Vol = 150 (unit for all sections)
Rivni: 80 100 110 120 130 140 150 (more wheezing starts)
Now all the volumes are adjusted within adequate ranges.
If you are not controlled by the volume level, you can set your values (the higher the value, the greater the volume when adjusting the volume keys or the greater sensitivity of the microphone)
By analogy, you can adjust more sections! Experiment!
Android smartphone developers use the engineering menu to test devices. He has all sorts of tests and adjustments to the device that are not available to cross-border operators. However, today, if you know the USSD command or have downloaded the program from PlayMarket, you can go to the engineering menu.
Now you need an engineering menu in Android
Engineering menu (Engineering Mode) – for its essence, it is an add-on that is used by developers for testing and installation optimal parameters mobile phone or a tablet. Facility workers check the operation of the sensors and, if necessary, make adjustments to the functioning of system components.
Working with technical Android menu, be careful - changing some of the functions may cause malfunctions in the device.
How to get to the menu
To open the menu installed by the driver, activate the dial pad on your smartphone and enter one of the entries in the table of USSD commands. After entering the command, numbers will appear on the screen, and instead of them, a menu will open.
Table: combinations for launching Engineering Mode
| I'll add a virobnik | Team |
| Sony | *#*#7378423#*#* |
| *#*#3646633#*#* | |
| *#*#3649547#*#* | |
| Philips | *#*#3338613#*#* |
| *#*#13411#*#* | |
| ZTE, Motorola | *#*#4636#*#* |
| HTC | *#*#3424#*#* |
| *#*#4636#*#* | |
| *#*#8255#*#* | |
| Samsung | *#*#197328640#*#* |
| *#*#4636#*#* | |
| *#*#8255#*#* | |
| Prestigio | *#*#3646633#*#* |
| LG | 3845#*855# |
| Huawei | *#*#2846579#*#* |
| *#*#14789632#*#* | |
| Alcatel, Fly, Texet | *#*#3646633#*#* |
| Smartphones and tablets with a MediaTek processor (most Chinese devices) | *#*#54298#*#* |
| *#*#3646633#*#* | |
| Acer | *#*#2237332846633#*#* |
Video: how to work in Engineer Mode
If the code does not work, and the standard way to launch the service menu does not work, please check third party programs- You can enchant them on PlayMarket. Recommended programs - "Launch the MTK engineering menu", Mobileuncle Tools, Shortcut Master.
The options menu does not work on some models of devices running Android 4.2 JellyBean (x.x.1, x.x.2), as well as Android 5.1 Lollipop. The menu is also ineffective when installed firmware Cyanogen Mod. In Android 4.4.2, when you re-download, the changes are thrown away and added to the supplement.
"Launch the MTK engineering menu"
The program allows you to open and customize the engineering menu without typing digital commands. Works correctly on MediaTek processors (MT6577, MT6589 etc.) and Android systems 2.x, 3.x, 4.x, 5.x. According to the users, the program successfully restores its functions, and after restarting the smartphone, the settings required for the additional program are reset.
Mobileuncle Tools program
The functionality of the program is similar to the previous one, except that in addition to accessing the engineering menu, users have the opportunity to view information about the screen, sensor and device memory, as well as update the firmware, update the IMEI number and change the GPS. For stable operation, root rights are required.
Shortcut Master utility
The Shortcut Master program is intended for robots with shortcuts and system programs: creation, poshuku, vidalnya. There are no direct login functions in the engineer menu. With this help, you can look at the list of secret commands that operate on the device. And having pressed the command on the name, open the menu, in which case there will be a “Viconati” item. Manually and does not require any action.
Root rights to access the engineering menu
To use the service menu on current versions of Android, the root user is responsible for the rights of the superkoristuvach (root). You can revoke rights for additional specialized programs: Farmaroot, UniversalAndRoot, Romaster SU and others. To remove Root access to the Farmaroot extension:
- Install and run the program. Posilannya on Google Play: //play.google.com/store/apps/details?id=com.farmaapps.filemanager&hl=ua.
- Since the program supports the installation of root rights on your device, you will see a list on the screen possible actions, Among them is “Otrimat root”. Select this item.
- Select one of the available root removal methods.
- The program is installed differently.
- After completing the procedure, you will receive notification of success install root access.
Possible problems and solutions:
- the program closed in the middle of installation - restart the device and try again;
- root rights are not installed - try installing using a different method (select a new exploit from the add-on).
What can you set in the menu?
The external appearance of the engineering mode and the possibility of adjusting parameters may vary depending on the tablet or smartphone model. In the menu you can most often adjust the sound, change the camera settings and change the update mode. The parameters for customizing and ordering are listed below. Please be respectful - menu item names may vary various models extensions! You live at your own risk and risk.
Audio: power up the volume
If your phone does not ring loudly enough, find the Audio section in the engineering menu and go to LoudSpeaker Mode. Select Ring. For the skin level of the signal (level 1–6), change the value - set the increase numbers, from 120 to 200. Increase the value in the Max item. Vol - maximum 200. Press the SET button to save adjustments.
Audio: increase the volume of telephone calls
To enhance the speaker tone for volume, in the Audio service menu section, select Normal mode and open Sph. Set the values equal to the signal (level 1–6) from 100 to 150, and the number for Max. Vol. - Up to 160.
To increase the sensitivity of the microphone, go to the menu Audio – Normal mode – Mic. For skin level, set the microphone sensitivity to the same value, for example, 200. Press the SET button, select re-engagement and turn it over so that the speaker becomes a little shorter than you.
Video: adjusting sound parameters in the engineering menu
Battery: switching on frequencies so as not to be victorious.
Smartphones quickly waste battery life on the work of add-ons, support Stilnikovy bondі edge connections. Using the engineering menu, you can increase the battery life.
Today's devices scan a range of GSM frequencies - 900/1800 MHz and 850/1900 MHz. Russia has a pair of 900/1800 MHz, so there is no need to scan the range of other frequencies. The radio signal for another pair can be turned off to greatly preserve the charge.
In Engineer Mode, open Band Mode. Turn off the frequencies that are not detected by checking the boxes from the following points - PCS1900 and GSM850. If the device supports two SIM cards, open the SIM1 and SIM2 items and select the appropriate actions in each box. Press the SET button to save settings.
If your smartphone or SIM card operates on 3G networks, you must enable networks that are not supported in Russia: WCDMA-PCS 1900, WCDMA-800, WCDMA-CLR-850. Press the SET button again.
You can close the scan of these measurements by turning to the same menu and checking the boxes.
Camera: customized photo and video
When you wash your Android device, you save your photos to JPEG format. Sometimes photographers can choose to capture and process material from RAW to allow for more editing options. The technical menu allows you to select the desired photo format.
Find Camera in the menu and select Capture Type. Set the photo format to RAW and press SET. Also in the Camera menu you can increase the photo size, set ISO values, turn on HDR for more detailed photos, and set the frame rate for video. After changing the skin parameter, do not forget to press SET to save adjustment.
Update mode
Recovery Mode(Update mode) is an analogue of Bios on a computer, which allows the device to be installed without logging into Android system. Possibility of the update mode:
- reset to standard;
- firmware update;
- access to root rights;
- creating a backup copy of the OS;
- removal of personal data from the system.
In Recovery Mode, don’t forget about this unless you know what it’s going to take you to. Any commands can harm the system.
If you didn’t take care of the adjustments
Customers who have been denied access to the technical menu are advised that the changed parameters are not activated or are reset when the device is restarted.
To enter into operation after changing parameters, tap on the SET button at the bottom of the screen. If the parameters are reset after restarting the device, try accessing the technical menu not through the program, but using an additional digital command.
Android device service codes
In addition to the technical menu, the functionality of smartphones on Android allows secret USSD codes - the identification of numbers and symbols that the user enters. Secret codes for various outbuildings shown in the table.
Table: list of secret commands for Android
| Virobnik | Digital Team | Significance |
| Codes for most players | *#*#7780#*#* | Installation and uninstallation of powerful programs |
| *2767*3855# | Firmware change, total adjustment. | |
| *#*#232339#*#* *#*#526#*#* |
Checking wireless connections | |
| *#*#34971539#*#* | Detailed information about the camera | |
| *#*#232338#*#* | Review of Wi-fi address | |
| *#*#273283*255*663282*#*#* | Activating a media backup on your phone | |
| *#*#1472365#*#* | Express GPS test | |
| *#*#0*#*#* | Checking the screen | |
| *#*#2663#*#* | Review of information about the touchscreen | |
| *#*#2664#*#* | Testing the touchscreen | |
| *#*#4636#*#* | Additional data for installation and batteries | |
| *#*#0673#*#* *#*#0289#*#* |
Audio test | |
| *#*#7262626#*#* | Checking GSM reception | |
| *#*#0842#*#* | Vibration signal and display brightness test | |
| *#*#3264#*#* | Information about RAM memory | |
| *#*#232331#*#* | Bluetooth test | |
| *#*#8255#*#* | Google Talk re-verification | |
| *#*#232337#*#* | Bluetooth address information | |
| *#*#1234#*#* | Details of the firmware for the device | |
| *#*#44336#*#* | I’ll add the folding date | |
| *#06# | Information about IMEI number | |
| *#*#197328640#*#* | Service activity test | |
| *#*#1111#*#* | Free-to-air version of the program | |
| *#*#2222#*#* | Airfare number for free-to-air | |
| *#*#0588#*#* | Checking the proximity sensor | |
| Sony (devices have two single commands) | **05***# | Unblocking the PUK code |
| Motorola | *#06# | IMEI |
| *#*#786#*#* | Vіdkat adjustment to cob | |
| *#*#1234#*#* *#*#7873778#*#* | Opening programs with root rights | |
| *#*#2432546#*#* | Verification of evidence update | |
| *#*#2486#*#* | Login to the service menu | |
| HTC | *#*#4636#*#* | Service menu |
| ##3282# | System add-on EPST | |
| *#*#8255#*#* | G-Talk monitor | |
| ##33284# | Merezhi camp | |
| *#*#3424#*#* | Functional test | |
| ##3424# | Diagnostics will be added | |
| ##7738# | Diagnostics protocol | |
| ##8626337# | Voice Coder | |
| Samsung (effective hidden codes) | ##778 (+dink) | Activation of the EPST menu |
| LG (working with codes is replaced by a technical menu) | 3845#*855# | International devices |
| 3845#*400# | Chinese apartments | |
| 5689#*990# | Sprint | |
| ##228378 (+ wiki) | Verizon Wireless | |
| 3845#*851# | T-Mobile | |
| 3845#*850# | AT&T |
If for any reason you have not requested the service code, do not be embarrassed - install and run the Secret Codes program (Posted to Google Play: //play.google.com/store/apps/details?id=fr.simon.marquis.secretcodes&hl= ru) .
The program analyzes the combinations that the device has and sends you a list. The combination can be activated immediately in addition to just one click on the name.
Of course, many smartphone owners have encountered the problem of thickness. For example, I was not influenced by two speeches. The first is a quiet sounding speaker with the input buzzer, and the other is a very loud sound on the headphones with the input buzzer.
A little about those who support Android buggy If you don’t have a headset connected to your gadget (headphones, free hands, etc.), then the settings will be the same, but as soon as you connect the headset, the settings will become different. For zagalnogo rozumіnnya
Let's call a bunch of butts. butt 1.
If you listen to music on your phone, you turn up the volume of the loudspeaker, and if you connect the headset again and turn the loudspeaker down again, the volume may increase (it may be louder or lower, depending on the phone model or firmware version). You'll be surprised that the volume on the headphones is set to 40%, and then after about an hour you get an outgoing call, then the volume on the headphones will change to a hidden volume, in which case you can cancel and a pressing sound blow on the woof. Believe me, I have often woken up from the sofa in such outbursts, on the right because the programs poorly adjusted the intensity modes.
butt 3. You talk with your phone and you need to switch to speakerphone mode, and you note that the speaker is not as loud (or at all) as when listening to music; Otherwise, your partner is sensitive to you, so in different modes the microphone can cause different sensitivity. Also, when the headset is connected in the same situation and the manual link mode is turned on, the settings will be different again. The axis thus preserves Android's humility.
Understanding the theory of menu engineering
So let's take a look at what and how you can earn by playing around a little with the “Engineering Menu”.
Before making any changes, we recommend that you read the article thoroughly and understand, and then experiment. Also, take a paper and write down all the meanings behind the steps, just in case anything goes wrong. You can launch the engineering menu by selecting telephone dialing numbers: the following combinations are written on the new page (Fig. 1):

baby 1
*#*#54298#*#* or *#*#3646633#*#* or *#*#83781#*#* – smartphones based on the MTK processor
*#*#8255#*#* or *#*#4636#*#* – Samsung smartphone
*#*#3424#*#* or *#*#4636#*#* or *#*#8255#*#* – HTC smartphones
*#*#7378423#*#* – Sony smartphones
*#*#3646633#*#* – smartphones Fly, Alcatel, Philips
*#*#2846579#*#* – Huawei smartphones
Well, we went to the engineering menu (Fig. 2). Please be aware that the menus on some phones may vary slightly in structure. We know the “Audio” section and go to the next one. After entering many unknown rows (modes) (Fig. 3). What do these modes mean in Android:


baby 2 baby 3
— Normal Mode(Separated for setting up in normal or emergency mode) – this mode is active if nothing is connected to the smartphone;
— Headset Mode(headset mode) – this mode is activated after connecting headphones or external speakers;
— Loud Speaker Mode(buzzer mode) – it is activated if nothing is connected to the smart phone, and you activate the buzzer when you are on the phone;
— Headset_LoudSpeaker Mode(buzzer mode when a headset is connected) – this mode is activated when you connect headphones or external speakers to the smart phone, and you turn on the buzzer before you talk on the phone;
— Speech Enhancement(telephone mode) – this mode is activated in the initial telephone mode, when nothing else is connected (headset, external speakers) and the speakerphone is not turned on.
The three remaining ones have a more beautiful nose than bad:
— Debug Info- I don’t understand why - information on backup information or improvement;
— Speech Logger- I haven’t figured it out until the end, I’ve finished everything, Log’s appointment is under the hour of negotiations or the recording of Balakanin. If you check the box next to Enable speech log, then after the end of the telephone call, additional files are created in the root directory of the memory card. This name structure gives an immediate appearance: Wed_Jun_2014__07_02_23.vm (Seden_lipen_2014__hour07_02_23.vm).
It is not clear what these files serve and how they can be of benefit to us. The /sdcard/VOIP_DebugInfo directory (which is where files with information are saved from backup) is not created automatically, but if you create it manually, then after you delete it you will end up empty.
— Audio logger– disgusting software for recording sound that supports quick search, created and saved.
To approach these modes wisely, you can adjust the volume of Android smartphones or tablets the way you want. When you enter any mode, you will see different settings available (Type). The axis of transfer of the main adjustments that you need to know (Fig. 4):

baby 4
—Sip- Setting up for Internet calls;
— Mic- Adjusting the sensitivity of the microphone;
— Sph- Adjustment of the loudspeaker (the same one that is applied to the speaker);
— Sph2- Setting up another speaker (I don’t have one);
— Sid- Skipable, when you change these parameters during an hour of negotiations on your smartphone or tablet, you can feel like you are replacing your computer;
— Media– adjusting the level of multimedia content;
— Ring– adjusting the level of density entrance bell;
— FMR– adjusting the volume of FM radio.
Next, under the selection item, we can adjust the available level of thickness (Level) (Fig. 5). For a quick understanding, there are 7 such levels, from level 0 to level 6. The skin level is indicated by one “click” on the adjustment dial of the smartphone or tablet. Apparently level 0 is to find the highest level, and level 6 is the highest level of the signal. The skin level can be given its own values, which are found in the middle of Value is 0~255, and without fail go beyond the range from 0 to 255 (the lower the value, the lower the sound). To do this, you need to first erase the old value, then enter a new one (bazhana) and press the “Set” button (the one indicated in the middle) for assignment (Fig. 6). When vikoristanna maximum values Be careful, parts of the speakers may produce uncharacteristic unpleasant sounds that may appear to be distorted and other unpleasant effects.


baby 5 baby 6
Get ready! Before making changes, rewrite all factory values (there is no way around this).
You belong to the nobility!
Editing modes in the engineering menu
Let's call a bunch of butts. How to increase the volume of the input signal?
To do this, you need to go to the engineering menu, scroll to the Audio section, go to LoudSpeaker Mode and in adjusting the volume, select Ring - adjust the volume of the input call. Then successively change (move) the values of all signal levels (level 0 – 6). Also, for greater effect, you can increase the value in the Max Vol section. 0~160, since it’s not the maximum (I set mine to 155; at a higher value, the speaker starts to “wheeze”).
If you listen to music on your phone, you turn up the volume of the loudspeaker, and if you connect the headset again and turn the loudspeaker down again, the volume may increase (it may be louder or lower, depending on the phone model or firmware version). How to increase the volume before the hour of talking on the phone? (Increasing the volume of a small speaker that is applied to the ear).
We go back to the already known engineering menu, select the “Audio” section, go to the special mode “Normal Mode”, and in this place select Sph - this parameter indicates the change in the value of all levels of signals in the interval and from level 0 to level 6. You can set the required one for us rhubarb. In the section Max Vol. 0~160, you can also change the higher tension value.
butt 3. Increased sensitivity and sensitivity of a smartphone's handheld microphone
To adjust and set the required level of volume and sensitivity of the microphone, you need to go to “Engineer menu” > “Audio” > “Normal Mode”> select Mic-adjustment of microphone sensitivity, and for all Their ranks (level 0 – level 6) are assigned to one same meaning, for example, 240. Now the spivrozmovnik is guilty a little more than you.
butt 4. How can I increase the volume of audio recording during video recording?
It is possible that if there is a need to increase the level of sound recording during video recording, then in the engineering menu for our loudspeaker mode (LoudSpeaker Mode) change the microphone sensitivity adjustment (mic), e are all values at all levels (level 0 – level 6), for example, set to 240 skin level. I’ll remind you about pressing the (set) button - renewing my love for gadgets and radios.
Before speaking, after adjusting the singing parameter, do not forget to press the “Set” button. This is the responsibility of fixing and accepting your team until the end. Otherwise, the installed parameters will not be activated. In addition, a number of mobile devices need to be re-engineered in order for changes to occur (the devices will change).
Good luck to you in your experiments, if it’s not clear enough - write in the comments. We look forward to your confirmation.
Table of codes for entering the engineering menu
| smartphones based on MTK processor | *#*#54298#*#* or *#*#3646633#*#* or *#*#8612#*#* |
| Samsung | *#*#197328640#*#* or *#*#4636#*#* or *#*#8255#*#* |
| HTC | *#*#3424#*#* or *#*#4636#*#* or *#*#8255#*#* |
| Huawei | *#*#2846579#*#* or *#*#14789632#*#* |
| Sony | *#*#7378423#*#* or *#*#3646633#*#* or *#*#3649547#*#* |
| Fly, Alcatel, Philips | *#*#3646633#*#* or *#9646633# |
| Prestigio | *#*#3646633#*#* or *#*#83781#*#* |
| ZTE | *#*#4636#*#* |
| Philips | *#*#3338613#*#* or *#*#13411#*#* |
| TEXET | *#*#3646633#*#* |
| Acer | *#*#2237332846633#*#* |
| Blackview | *#*#3646633#*#* or *#35789#* |
| Cube | *#*#3646633#*#* or *#*#4636#*#* |
| Cubot | *#*#3646633#*#* |
| Doogee | *#*#3646633#*#*, *#9646633# , *#35789#* or *#*#8612#*#* |
| Elephone | *#*#3646633#*#*, |
| HOMTOM | *#*#3646633#*#*, *#*#3643366#*#*, *#*#4636#*#* |
Note: The table is constantly updated
Why do you need rutuvania? Android devices And what possibilities it gives, it is clear enough great number koristuvachiv, which cannot be said about the expanded menu of hardware settings, also called engineering menus. Little is known about this training, and even fewer Vlasniks know mobile devices get in touch with them. What is the Android engineering menu and what else is needed?
The Android engineering menu is nothing more than a special subprogram intended for testing by retailers operating system I’ll install sensors. The interface of the presentation program has a set of options that allow you to change the configuration of the mobile device entry. Here you can also obtain comprehensive information about the hardware of the gadget, test the processor, RAM and physical flash memory, wireless connection modes, adjust the parameters of the camera, display, microphone, and a lot of other things.
Login to the engineering menu
All this, of course, is good, only how to go to the engineering menu, since there is no other option in the Android interface? To enter the menu of advanced hardware settings, you need to use an additional special code to be entered in the dial row phone number. The menu must be opened immediately after entering the remaining combination symbol, otherwise you may need to press the click button in the following fields.
There is nothing complicated about the procedure itself, however, it is clear that different models of mobile gadgets can provide their own codes. Below is a list of codes for the most popular printers.
The engineering menu codes in Android are universal; they are not guaranteed to work correctly on phones with the latest firmware. To access the hardware customize Android You can also use Vikorist special programs for example, "MTK Menu Engineer" or else "Mobileuncle MTK Tools".

Similar programs are especially available on tablets, the firmware of which does not convey the presence of a “dialer”. The interface and the range of available options for these programs are quite varied, however, getting to grips with them is not particularly difficult.
Regardless of the method you use, you need to be as careful as possible when working with the engineering menu. Before starting the operation, it is recommended to record all the values of the output parameters so that adjustments can be updated. Conduct experiments with the engineering menu just to find out what is unacceptable, then you can make your device unusable!
To select a list of engineering codes for specific model you can quickly call the phone special supplement Secret Codes, available from Google Play. On some models of mobile devices, super user rights (root) may be required for full access to the engineering menu.
What can you change in the additional menu?
You know how to use it in the engineering menu, now let’s find out how you can make adjustments with this help. The possibilities are more or less wide. The menu program supports changing the level of speaker volume and microphone sensitivity, adjusting the built-in camera, audio parameters, GPS modules, Bluetooth and Wi-Fi, connecting uncontrolled frequencies to save battery power ї. You can also protest the key components of your device external map memory, adjust input-output operations, determine the exact temperature of the processor and battery, and the level of wasteful electromagnetic vibration.
Junior bark functionє denying access to the update mode - analogous to the BIOS on computers, which can be used to set up settings. Possibilities of the update mode include resetting the device to factory settings, updating the firmware, creating a backup copy of the operating system, removing access to root rights, and deleting confidential data from the user. It is impossible to rearrange all the options of the engineering menu within one item, the more sensors and components there will be in a phone or tablet.
Increased phone frequency through the engineering menu
And now we will demonstrate the robot with hardware adjustments on the application of one of the most popular operations and find out how to increase the volume on Android through the engineering menu. Now, go to the menu for Mobileuncle MTK Tools or enter the “charming” code, then you will find and open the Audio subsection. If you entered the menu through the Mobileuncle Tools program, this section is located in the senior section Engineer Mode, in other cases it is located in the Hardware Testing tab.

The following options will be available to you in the Audio module:
- Normal Mode emergency mode, what happens if there is no headset connected to the device.
- Headset Mode – headset mode that turns on when headphones or speakers are connected to the smartphone.
- LoudSpeaker Mode – Guchnomovtsy mode. It is activated when the handset is turned off, if the headset is not connected to the device.
- Headset_LoudSpeaker Mode – speaker mode with a connected headset. The same ones in front, except with connected headphones or speakers.
- Speech Enhancement – this mode can be used when talking on the phone without having to make a call.

The section may have other settings, for example, Debug Info and Speech Logger, but they should not be ignored. Select the mode for which you need to change the thickness level (don’t forget Normal Mode), select Type from the list and indicate for which function you will change the thickness. The following functions may be available:
- Ring – adjustment of the volume for input units;
- Media – adjusting the volume of the speakers during the time of multimedia creation;
- Sip – sound setup for Internet calls;
- Sph - sound adjustment of the loudspeaker;
- Sph2 – sound adjustment of another speaker (options may be available);
- Mic – change the sensitivity of the microphone;
- FMR – adjusting the frequency of FM radio;
- Sid – this parameter should not be changed, otherwise problems may arise from the voice of the spyware.
Having selected the function, scroll through the flow list, set the required Value value (from 0 to 255) and press for setting new Set settings.

To change the level of intensity, you can quickly install templates - the Level option. Most phones have these levels, ranging from 0 to 6. The Max Vol adjustment should not be ignored, just as it is not good to set too high values for Value, otherwise the sound from the speakers will become more wheezing. You can set up other modes in the Audio section in a similar way.
To adjust new settings for all models of smartphones and tablets, you will need to re-install them.
Skidannya nalashtuvan
I will stop with what we will look at today, but by resetting the engineering menu parameters to the factory values. This may be necessary if you start to process incorrectly after making device changes. There are a number of discount methods available. If the system is properly activated, go to Settings and open the “Updates and Discounts” section.


You can also reset the engineering menu by entering a special service code into the dialer. Call *2767*3855#, *#*#7780#*#* or *#*#7378423#*#*, otherwise your phone model may need its own code.
Another option is to quickly use the update mode, which has been mentioned above. To make the most of it, try one of these combinations:
- Increase + change thickness button.
- Increase + increase thickness button.
- Increase button + “Dodom” button + change/increase thickness.
- Button: increase + increase thickness + change thickness.
From the list of options, select “wipe data/factory reset” → “Yes – delete all user data” → “reboot system now”. The device will be re-enabled, and the settings will be reset.


Another way to remove the customization of the engineering menu, but it also exposes the rights of a super customer. Vikorista, come what may file manager with support root rights, go to the root directory of the system, and then delete all or partly instead of the folder data/nvram/apcfg/aprdcl then re-engage.

Dad's files aprdcl themselves indicate the adjustment of the engineering menu. It's easy to delete all files at once. If you screw up, say, with the adjusted audio, to update the output parameters it is enough to delete the files, including the audio row element. And one more thing. Regardless of the method of discount, work first backup copy of your particular data and additions, all fragments can be disposed of.