Oracle VirtualBox is such a practical tool for virtualization that is open source. It is he who allows you to simplify the creation of virtual installations that simulate the computer itself. They also function on your PC, but their work is the same if they were not as a whole, but machines separately.
This program has a lot of functions. It should be noted that the application supports 64 bit guest systems.
With this VM VirtualBox program, a separate environment is created for software that is already running. This application monitors all links and provides direct support for them.
Password for all archives: 1progs
Installation video
Although at first glance, the tool is a little complicated, but when you work you already understand that everything can be figured out. If you need to download a free tool in Russian, you can do it on this page.
Why use this program? In fact, everything is quite simple. With its help, it becomes possible to launch the operating system, but not to carry out its actual installation. The virtual machine makes it possible to switch between different operating systems in one click and test them.

Since we all love to experiment, rummage through the system settings, start something of our own making, then you need to think about a safe place to experiment. This place will be for us the VirtualBox virtual machine with Windows 7 installed.
When starting the VirtualBox virtual machine (hereinafter VB), the user sees a window with a completely Russian-language interface.
As a reminder, when you install an application, the shortcut is automatically placed on the desktop. If this is your first time creating a virtual machine, in this article you will find detailed instructions that can be helpful at this stage.
So, in the new window, click "Create", after which you can select the OS name and other attributes. You can choose from all available operating systems.

Go to the next step by pressing "Next"... Now you need to specify how much RAM should be allocated for the VM. For its normal functioning, 512 MB is enough, but you can choose more.

After that, we create a virtual hard disk. If you've created discs before, you can use them. However, in the same article we will focus on how they are created.
We mark the item "Create a new hard drive" and move on to further steps.


In a new window, you need to specify where the new disk image should be located and how large it is. If you create a bootable disk containing Windows 7, then 25 GB will be enough (this figure is set by default).

In terms of placement, the best solution would be to place the disk outside of the system partition. Failure to do so may overload the boot disk.
If everything suits you, click "Create".
When the disk is created, the parameters of the created VM will be displayed in a new window.

Now you need to configure the hardware of the virtual machine.
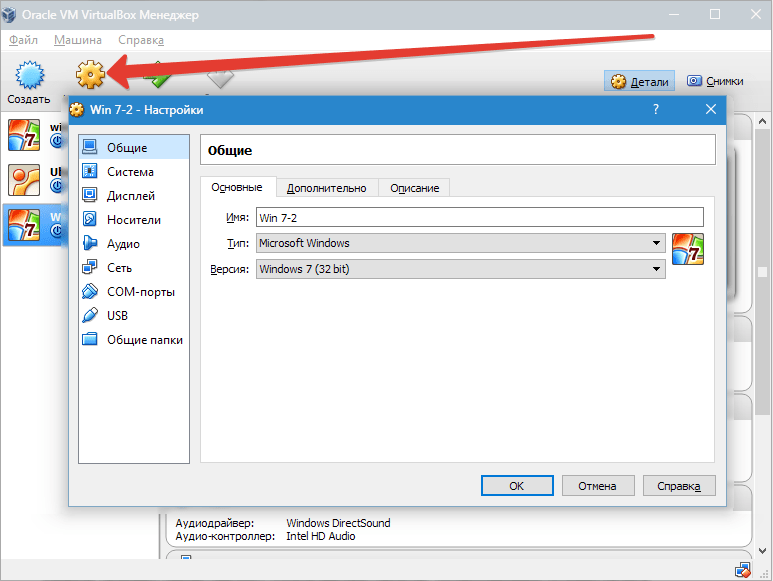
In the General section, the 1st tab displays key information about the created machine.
Open the tab "Additionally"... Here we will see an option "Folder for pictures"... It is recommended to place the specified folder outside the system partition, as the pictures are large.
"Shared clipboard" implies that the clipboard works when your main OS and VM interact. The buffer can work in 4 modes. In the first mode, the exchange is made only from the guest operating system to the main one, in the second - in the reverse order; the third option allows both directions, and the fourth disables data exchange. We choose the bidirectional option as the most convenient.
"Mini toolbar" is a small panel that allows you to manage the VM. We recommend activating this console in full-screen mode, since it is completely duplicated by the main menu of the VM working window. The best place for her is at the top of the window, since there is no risk of accidentally clicking one of her buttons.

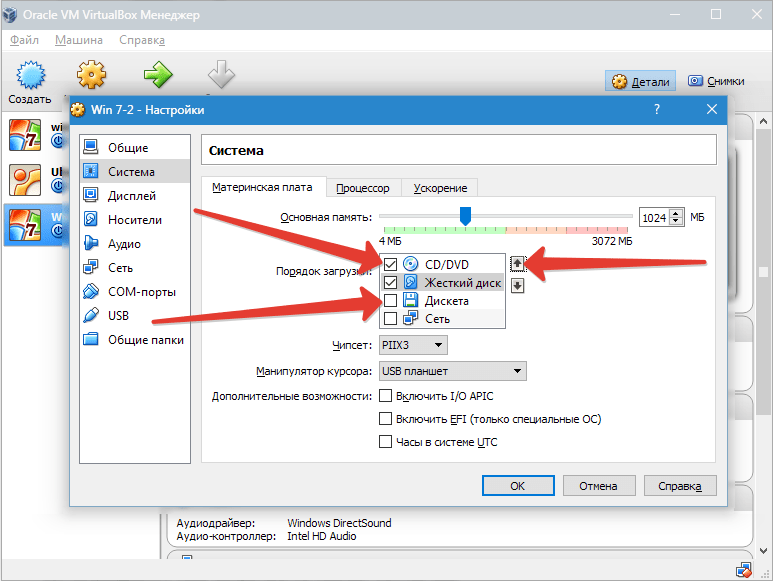
Go to section "System"... The first tab offers to make certain settings, which we will discuss below.
1. If necessary, you should adjust the amount of RAM of the VM. At the same time, only after its launch will it become fully clear whether the volume is correctly selected.
The choice should be based on the size of physical memory installed on the computer. If it is 4 GB, then it is recommended to allocate 1 GB for the VM - it will function without "brakes".
2. Let's define the order of loading. The floppy disk player is not needed, we turn it off. The 1st in the list should be assigned to the CD / DVD drive in order to be able to install the OS from the disk. Note that this can be either a physical disk or a virtual image.
For other settings, see the reference section. They are closely related to the hardware configuration of your computer. If you set the settings that are not consistent with it, the VM will not be able to start.
On a bookmark "CPU" the user specifies how many cores there are on the virtual motherboard. This option will be available if hardware virtualization is supported AMD-V or VT-x.
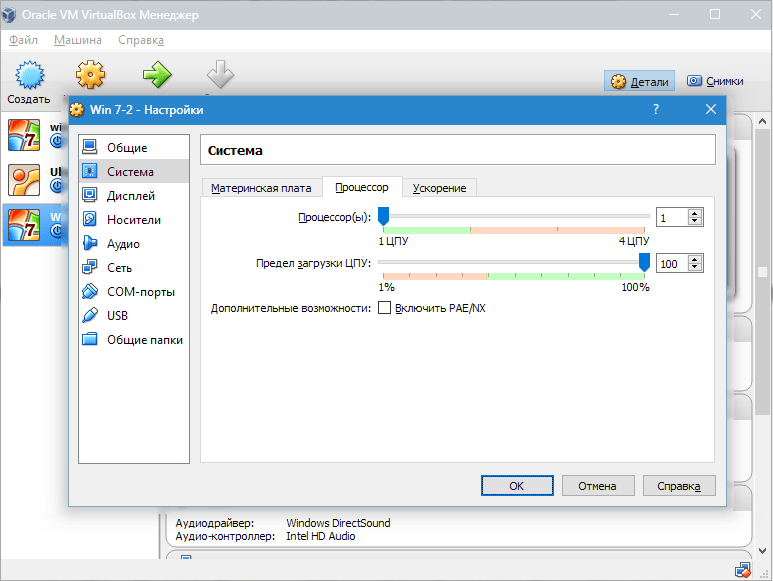
Regarding hardware virtualization options AMD-V or VT-x, then before activating them, you need to find out whether these functions are supported by the processor and whether they are initially included in BIOS - it often happens that they are disabled.

Now consider the section "Display"... On a bookmark "Video" the amount of memory of the virtual video card is indicated. The activation of 2D and 3D acceleration is also available here. It is desirable to enable the first of them, and the second parameter is optional.

In section "Carriers" all disks of the new virtual machine are displayed. Also here you can see a virtual drive with the inscription "Empty"... We will mount the Windows 7 installation disk image into it.

The virtual drive is configured as follows: click on the icon on the right. A menu opens in which we click "Choose an optical disc image"... Next, add the boot disk image of the operating system.


We will not cover issues related to the network here. Note that the network adapter is initially active, which is a prerequisite for a VM to go online.
On the section COM it makes no sense to dwell in detail, since today nothing is connected to such ports.
In section USB check both available options.
Let's go to Shared folders and select those directories to which the VM is going to provide access.
This completes the entire setup process. Now you can start installing the OS.
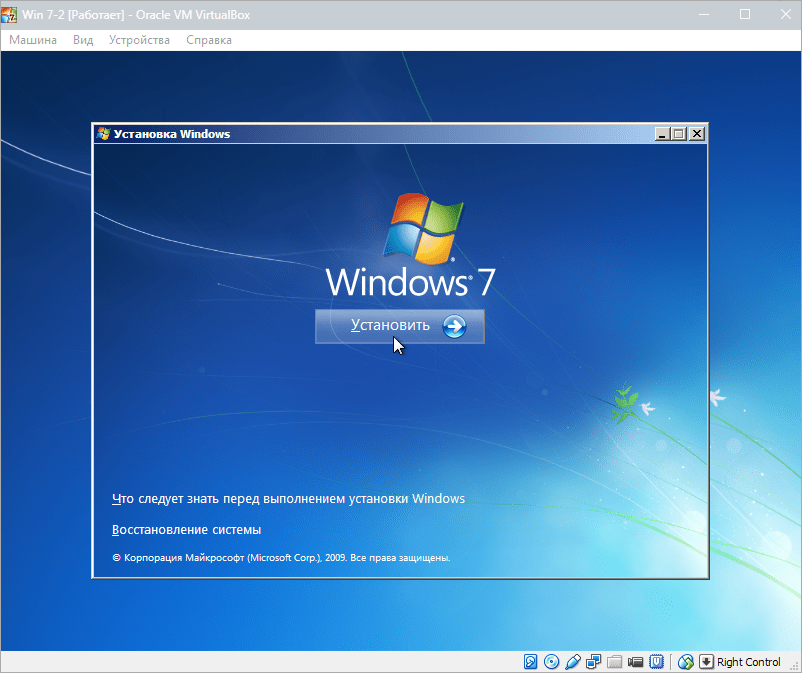
Select the created car in the list and click "Run"... Installing Windows 7 on VirtualBox itself is very similar to a regular Windows installation.
After downloading the installation files, a window with a choice of language will open.

We accept the terms of the license.

Then choose Full installation.

In the next window, you need to select a disk partition for installing the operating system. We have the only section, so we select it.


During installation, the machine will automatically reboot several times. After all reboots, enter the desired username and computer name.


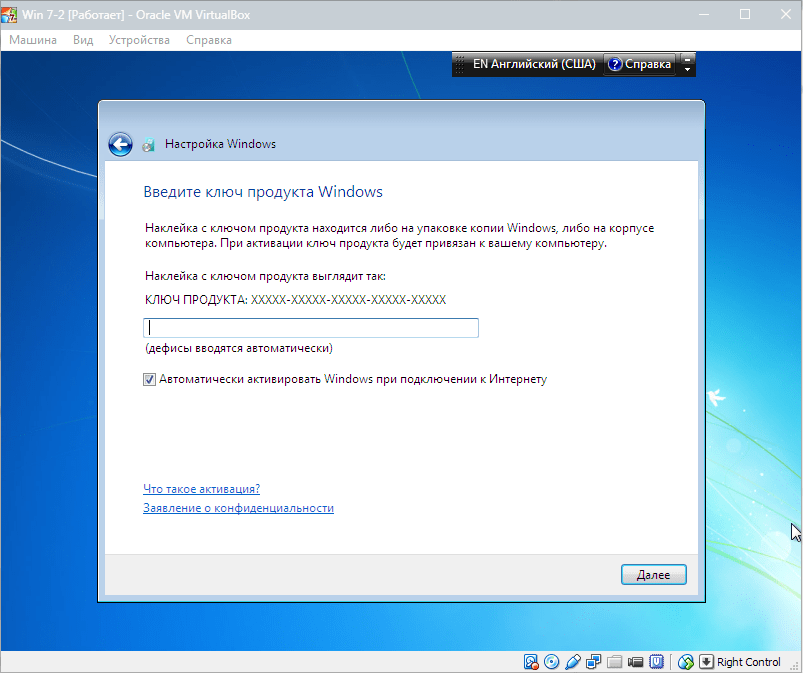
Here we enter the product key, if any. If not, then just click "Further".

We set the time zone and date.

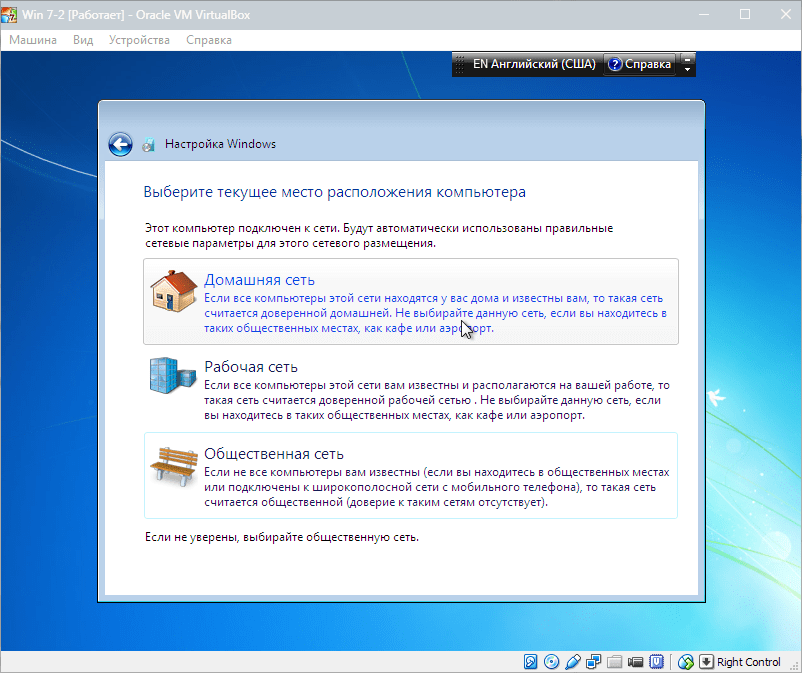
Then we choose which network to assign our new virtual machine to. Push "Home".
After these steps, the virtual machine will automatically reboot and we will get to the desktop of the freshly installed Windows 7.

Thus, we have installed Windows 7 on the VirtualBox virtual machine. Then it will need to be activated, but this is a topic for another article ...
Network and server administrators are often faced with the need to test hardware, software and certain parameters and settings on real servers. But testing something on a running server is extremely dangerous, as it can lead to data loss and malfunctions.
Specialized software comes to the rescue in this situation. Able to emulate a real computer and perform all the necessary actions with it. The most popular program in this case is VirtualBox from Oracle.
How do I use virtualbox?
virtualbox 32/64 bit for windows 7 and 8 must be installed on a work computer running a Windows operating system. In the future, VirtualBox allows you to create any number of virtual machines with the selected parameters, and install any operating systems on them for testing. In this case, the real physical computer will be the host, and the operating system on it will be the host.
When installing an operating system on a virtual machine, you should pay attention to the fact that it must be configured properly and meet the minimum requirements. In this case, the operating system installed on the virtual computer is called the guest operating system.

The use of virtual machines makes it much easier to test hardware, software and necessary settings. With all this, the virtual and physical machines communicate with each other through a network connection. In addition, a virtual machine can take control of any hardware installed on a physical computer.
The program is also available for operating systems such as macOS and Linux (popular for Ubuntu and Mint).
VirtualBox is a program that can create a virtual machine for you that has the parameters of a real computer. Moreover, on the created machine it will even be possible to run any operating system.
You can download Oracle VM VirtualBox to a computer that does not only run on Windows. The utility supports Linux, Solaris, Mac OS X. Thus, using the software, you can run a virtual machine running Linux or even Windows on a Mac computer.
Functional
Oracle VM VirtualBox Utility is capable of:
- support guest systems on 64-bit and 32-bit systems,
- support hardware 3D acceleration, virtualization of audio devices,
- support file exchange between guest and host.
Since the basic version of Oracle VM VirtualBox is distributed under the GNU GPL license, there are no restrictions on its use, which means that it can be installed both at home and on devices that are on the balance of the enterprise.
We should also note the cross-platform nature of this software, as well as the fact that it is able to create guest 64-bit systems even when working on 32-bit host systems.
Interface
If you have already downloaded Oracle VM VirtualBox in Russian for free, then install it and run the program. Next, you will need to simultaneously press Ctrl + N. This will give you access to the "Create" option. Or you can click on the "Machine" menu item and select "Create" there.
You will need to come up with a name for the machine and select the type of operating system and its version for it.
Specify the amount of RAM that will be available for work in this guest system. If you do not enter values \u200b\u200bhere, the program will automatically install it for you. As a rule, it takes one third of the amount of RAM available on your PC. However, you can also specify your own parameters. However, try not to go beyond the green field. Since if you bring the slider responsible for these parameters outside this sector, then you may have problems with the system.
When this stage is passed, you will need to create a virtual disk. Here you have to decide how much space you need for this, and specify the desired value in the corresponding field. Now all that remains is to click on "Run".
But in order to specify the bootable CD image, you need to click on Devices - Optical Drives - Choose a virtual otical drive file.
You will see a window where you will need to pave the path to the file with the CD image on which the OS you need is loaded. Next, click on "Open". And thus the installation of the virtual operating system will end.
If you downloaded Oracle VM VirtualBox for Windows 10, 8, 7 at 32 bit and 64 bit from the new version, you will see that they have a number of significant additions. For example, you can now export virtual machines to Oracle Cloud. Also, the graphic selector has been redesigned, audio support is suppressed when recording video. However, this possibility is still experimental.
It is noteworthy that all machines created in this way are distinguished by high performance.
System requirements
Supported systems:
- Windows: Vista SP1 or higher (32-bit and 64-bit), Server 2008 (64-bit), Server 2008 R2 (64-bit), 7 (32-bit and 64-bit), 8 (32-bit and 64-bit), 8.1 (32-bit and 64-bit), 10 RTM build 10240 (32-bit and 64-bit), Server 2012 (64-bit), Server 2012 R2 (64-bit).
- Mac OS X hosts (64-bit): 10.9 (Mavericks), 10.10 (Yosemite), 10.11 (El Capitan)
- Linux hosts (32-bit and 64-bit): Ubuntu 12.04 LTS - 16.10, Debian GNU / Linux 7 ("Wheezy"), 8 ("Jessie") and 9 ("Stretch"), Oracle Enterprise Linux 5, Oracle Linux 6 and 7, Redhat Enterprise Linux 5, 6 and 7, Fedora Core / Fedora 6 to 24, Gentoo Linux, openSUSE 11.4 - 13.2
- VMware Workstation is a program that allows you to create virtual machines on a host system. In this case, the number of guest programs can be unlimited. It all depends on the capabilities of the host system itself. The guest operating systems installed on the computer operate in a virtual environment without affecting the real system. Thus, it will be possible to check suspicious software without fear that it will harm the native OS.
- Virtual PC. Virtualization software package for Windows operating system, and emulation software for Mac OS.
- VMware Workstation. Virtualization software designed for x86-64 computers with Microsoft Windows and Linux operating systems.
- Hypervisor. A program or hardware circuit that allows or allows multiple operating systems to run in parallel on the same host computer.
- QEMU. Free open source software for hardware emulation of various platforms. Includes emulation of Intel x86 processors and I / O devices.
Conclusion
There are many reasons why users might want a virtual system installed on a computer OS. Unfortunately, there are not so many decent softwares that allow you to realize what you want.
However, Oracle VM VirtualBox stands out noticeably against their background. Moreover, you can download Virtual Boxing in Russian. After all, this version will allow you to quickly understand the features of the program. You can download Oracle VM VirtualBox from our website.
Here you will find links to VirtualBox binaries and its source code.
VirtualBox binaries
By downloading, you agree to the terms and conditions of the respective license.
If you "re looking for the latest VirtualBox 6.0 packages, see VirtualBox 6.0 builds. Please also use version 6.0 if you need to run VMs with software virtualization, as this has been discontinued in 6.1. Version 6.0 will remain supported until July 2020.
If you "re looking for the latest VirtualBox 5.2 packages, see VirtualBox 5.2 builds. Please also use version 5.2 if you still need support for 32-bit hosts, as this has been discontinued in 6.0. Version 5.2 will remain supported until July 2020.
VirtualBox 6.1.4 platform packages
The binaries are released under the terms of the GPL version 2.VirtualBox older builds
The binaries in this section for VirtualBox before version 4.0 are all released under the VirtualBox Personal Use and Evaluation License (PUEL). As of VirtualBox 4.0, the Extension Pack is released under the VirtualBox Personal Use and Evaluation License and the other packages are released under the terms of the GPL version 2. By downloading, you agree to the terms and conditions of the respective license.
VirtualBox Sources
The VirtualBox sources are available free of charge under the terms and conditions of the GNU General Public License, Version 2. By downloading from the below links, you agree to these terms and conditions.