- a program that helps the user to move applications from the internal memory of the device to an external memory card. This is what many users liked and they decided that such a convenient application would be very useful to them. After all, the internal memory is often limited in volume, so it is worth keeping it and storing games or music is much more convenient on an external card. The application turned out to be convenient and extremely useful.
Also, the program has been translated into Russian, so it will be convenient for you and most importantly, it will be clear how to use it. Never before have users been able to work with applications so conveniently. If you always do not have enough internal memory in your mobile device, then such an application will definitely be useful for you. Feel free to start downloading it right now.


Due to the fact that the program performs incredible options, or rather helps the user to reallocate memory. It has become very popular, because you will always need a program that will help you free tens of megabytes from RAM.


As a result, it is a fairly high-quality application that will provide the ability to move an application from internal memory to an external card.
By default, all applications downloaded to the smartphone are installed in the internal memory. Each device has limited storage space, which results in insufficient free space to download a new game or program. For this reason, almost every user has tried to move software to a memory card. As practice shows, it is almost impossible to do this on modern phones. There are many articles on the Internet describing this procedure, but often they are about the method with root rights. We propose to consider how to transfer applications to an Android memory card through a computer, and completely without superuser rights.
What is needed for a successful transfer
For the correct transfer of the application from the internal memory to the SD card, you need to know some features. If you ignore the requirements written below, then there is a risk of turning your smartphone into a "brick".

The phone must have an Android version higher than 6.0. You can find out the operating system available on your smartphone through the settings:
- Go to the section " About phone" or " About device».
- Scroll down to “ VersionAndroid».
- To check the relevance, you can click on this line several times.
An animation corresponding to the version of the operating system will appear on the screen.
For this method, Android 6, 7, 8, 9 and higher are suitable.

Before starting the procedure, it is advisable to install the Activity Launcher application on your phone. You can find software on Google Play, for this:
- Open the Play Market.
- In the search enter the query “ Activity Launcher».
- Go to the page with the official utility.
- Click on the " Install"And wait for the download to finish.
The downloaded utility should appear on the desktop with the name "Application activation".
Class 10 or higher SD card
For the method to work correctly, it is recommended to purchase a new memory card, and it must be grade 10 and above... Any version of external storage will do, be it 8, 16, 32 or 64 gigabytes. You can find out the class of an SD card on its packaging, which is often referred to as "class 10".
Archive aftiss
Download the aftiss_b2.rar archive to your computer. It is with its help that the memory card will be converted into the internal storage of the device. You can download the archive on Windows XP, 7, 8, Vista and 10.
Instructions for Transferring Apps to SD Card on Android Phone
Having dealt with all the intricacies, let's go directly to the instructions itself. We recommend that you follow each step carefully to avoid crashes and unexpected errors.

To do the following:
- Open your smartphone settings.
- Go to the " About phone" or " About device».
- Quickly click on the item " Firmware version". The system will notify how many clicks are left to obtain developer rights.
- Then go to the section " Additional functions" or " Advanced settings».
- Here go to the " For developers».
- Find the line " Debugging byUSB»And activate the function by moving the slider to the right.
USB Debugging is now enabled, as indicated by the color indicator of the slider.

A regular USB cable used to charge the device is suitable for. After connecting, open the notification curtain and click on the line " Charging viaUSB". Change this parameter to " File transfer"Or another similar mode.
You need to install drivers for a specific device model on your computer. If the PC is running Windows 10, then they will boot automatically. For earlier versions, manual installation may be required. Finding drivers is not a problem - just indicate the exact model of the smartphone in the browser.
In the downloaded archive you need to find and run the script " aftiss. cmd».

Once launched, a command line with some text will appear on the screen.
Now you need to decide how much memory card size will become internal storage. Let's take a look at all the possible options:
- 1 - 20% of the SD storage becomes the phone memory;
- 2 - 50% of SD becomes device memory;
- 3 - 85% of the SD volume becomes the device's memory;
- 4 - your percentage;

You need to decide on the type of transfer yourself, but we recommend starting from the size of the memory card... That is, if it is 32 gigabytes, then it would be reasonable to choose the second transfer option (50:50). After that, enter the required command in the appropriate field.

We check the correctness of the entered data and click " Enter».

The system will start a series of processes, if successful, the display will show the message “ Done».

After the end of the procedure, it is advisable to make sure that the memory reallocation is correct. To do this, open the settings on your phone, then:
- Go to the section " Memory" or " Vault". The names depend on the smartphone model and the firmware installed on it.
- Scroll down to the sub-item " SD-map».
The available capacity will differ depending on the option used. For example, if the flash drive was 32 gigabytes, then when using the second option, about 15 gigabytes will be available. It is also worth noting that after this procedure, all programs will be installed by default onSD.

Now open the recently downloaded Activity Launcher. At the first start, the "Disclaimer" window will appear on the screen, in which you need to click " OK". Next, click on the top menu “ Recent Activity"And choose" All actions».

After the download is complete, do the following:
- Scroll down to the item " Settings».
- Here we click on the line “ All Apps". Please note that the required tab is located above the item without the icon.
After clicking, there should be an automatic transition to the page with all installed software.

Now it's not difficult to transfer some application to the SD card. For this:
- We find it in the list that opens.
- Go to the page with the utility.
- Click on the line “ Vault».
- Next, click “ Edit».
- From the list that opens, select “ SD-map».

Reverting a memory card to its previous form is much easier than turning it into the internal memory of a smartphone. First of all, transfer the applications from the flash drive back to the device storage. If this is not done, then after formatting the programs will not start.... After we reboot the device, then:
- Go to the "Storage" section.
- Click on the item " ClearSD-card" or " ClearUSB-storage device».
- We confirm the procedure with the button “ Clear and format».
The formatting speed directly depends on the size and class of the memory card.
Video instruction
Answers to popular questions
If the transfer cannot be performed through the settings, then this instruction was created for this.
As you can see, you can transfer an application to an Android memory card completely without root rights. Of course, this will require a computer, but almost every modern user has one.
Probably, each of us faced the problem of lack of memory or simply wanted to transfer applications to a USB flash drive, since the memory was already full, and games and applications could not be transferred to MicroSD and annoyed by the notification "Not enough memory on the device, some functions may be limited."
Even if I uninstalled many applications and games, there was still not enough memory. But how to increase memory without losing everything? Later in this article we will look at and find out how to solve this problem.
Immediately I want to warn you that neither I nor the site administration are responsible for your actions. You do everything at your own peril and risk.
P.S The article uses the most simplified words for better perception.
To continue, you will need:
- MicroSD Card with a class of at least 6 (preferably 10 class) and a size of more than 4 GB
- (To create a second section)
- (For transferring apps and games)
- (For transferring games with cache)
To increase memory, we will have to transfer your applications to the so-called second section of the MicroSD card (needed for transfer), and we will create it ourselves. If you already have a second section on your map, you can skip this item.
Creating a second microSD partition
1. Save all files on another medium (For example, on a computer)2. Disconnect the MicroSD card along the path "Settings / Memory / Disable memory card"

3. If you have ROOT rights, install, if not -

4. After starting, double-click on the "+"  5. Select “Ext4” in Part 2. If you have an Android 2.2-2.3 device, select "Ext 3"
 6. In Part 2, select the size, how much you want to allocate memory in MB from the card for applications and games (The more the better)
  7. Look at the first graph with a white bar, with the amount of remaining memory and enter these numbers in Part 1
 8. Check if you did everything right. If everything is correct, click on the menu button or on the so-called "three dots in the corner", and click on "Apply changes"
  Everything, the most difficult thing is over, you can reconnect the memory card (Settings / Memory / Connect the memory card), transfer the files back to the USB flash drive, but before that you can notice that the size of the memory card has decreased. This is as it should be, because we have created the second section.
Setting up transfer to the second section
We need to install the program (Google Play)
After installation, open the app. You should see a window like this. Select "Ext 4" or "Ext 3" for Android 2.2-2.3 and click on "OK".


After rebooting, open the app. You should see a list of applications.

We will now look at what can be migrated and what is better not to migrate.
Let's just say that system applications should never be transferred. You never know what will happen. Therefore, it is better to transfer custom applications (Those that you installed yourself). I do not advise you to transfer those applications that you actively use (for example, the Browser or there WhatsApp and the like).
And to make it more convenient, the application has sorting. To do this, you need to click on "Even three stripes" and select "Custom".


A list of your applications should appear in front of you. Now you can select those applications that you want to move to the second section and send them there. Click on "Three Dots", then on "Several", select the applications to transfer and click on "Send".


A few minutes of waiting and you're done! You have more memory, and you can still download games and applications and transfer them. If you dig into the Link2SD settings, you can enable auto-link. This is a function that automatically transfers the application to the second section of the map, thereby making your life easier.

Also in the settings you can change themes, buy the Pro version, and so on. But now is not about that. In general, we figured out the main problem. But, I want to tell you, Link2SD does not transfer game cache (Game cache is .obb files along the path Android / obb / "game package name"). So what should we do? Let's talk further.
Transferring game and data cache to microSD card
Cash games can be transferred using an excellent program called. I must say right away that the cache is transferred to the USB flash drive itself, and not to the second partition.
Open the application, and swipe from the left edge of the screen to the right edge (Swipe) and click on "Application Analyzer"


Sooner or later, every user of Android devices is faced with a situation when the internal memory of the device is about to run out. When you try to update existing or install new applications, a notification pops up in the Play Market that there is not enough free space, to complete the operation you need to delete media files or some applications.
Most applications are installed to internal memory by default. But it all depends on what place for installation the program developer has prescribed. It also determines whether it will be possible to transfer application data to an external memory card in the future or not.
Not all applications can be transferred to a memory card. Those that were preinstalled and are system applications cannot be moved, at least in the absence of root rights. But most downloaded applications tolerate moving well.
Before starting transfer, make sure there is enough free space on the memory card. If you remove the memory card, then the applications that were transferred to it will not work. Also, do not expect applications to work in another device, even if you insert the same memory card into it.
It is worth remembering that the programs are not completely transferred to the memory card, some of them remain in the internal memory. But the bulk is moved, freeing up the required megabytes. The size of the portable part of the application is different in each case.
Method 1: AppMgr III
The free AppMgr III (App 2 SD) has established itself as the best tool for moving and uninstalling programs. The application itself can also be moved to the map. It is very easy to master it. There are only three tabs displayed on the screen: "Movable", "On SD card", "In phone".
After downloading, do the following:


Another useful feature is the automatic clearing of the application cache. This technique also helps free up space. 
Method 2: FolderMount
FolderMount is a program created for the complete transfer of applications along with the cache. To work with it you need ROOT rights. If you have them, you can even work with system applications, so you need to carefully select folders.
And to use the application, follow these instructions:

Method 3: Move to SDCard
The easiest way is to use the Move to SDCard program. It is very easy to use and takes only 2.68 MB. The application icon on the phone may be called "Delete".
Using the program looks like this:

Method 4: Standard funds
In addition to all of the above, try to transfer the built-in tools of the operating system. This option is only available for devices with Android 2.2 or higher installed. In this case, you need to do the following:


But what if the Android version is lower than 2.2 or the developer did not provide for the ability to move? In such cases, third-party software can help, which we talked about earlier.
Using the instructions in this article, you can easily move applications to and from your memory card. And the presence of ROOT rights provides even more opportunities.
The green robot's “stomach” is smaller than a thimble. Especially on devices with little memory. I fed him a dozen or two super-mega-necessary programs - and the place ran out. But ... many of us have the opportunity to install a second "stomach" in the gadget and continue feeding further.
Today we will talk about transferring applications from internal memory to SD-card in smartphones and tablets on Android.
Which applications can and cannot be transferred
Among mobile applications, there are some that can be transferred between drives and some that cannot. When you transfer a program to an external medium, some components remain in the same place - in the permanent memory of the device.
If the program is relatively autonomous and not too whimsical in terms of the location of files and data, it will remain functional. And if it is deeply rooted in the operating system, when the work of other structures depends on it, the transfer may end in failure - not only this program will stop working, but everything that interacts with it. For this reason, it is absolutely not worth trying to move system applications.
The portability of third-party products to microSD varies. It depends on whether the author of the program has provided this opportunity. They don't write about this in the characteristics - everything is learned experimentally, but such experiments do not threaten with serious consequences. If after the transfer the program did not work, it is enough to return it to its place or reinstall it in the device memory.
Moving by system means
Modern versions of Android, starting from 6.0, support the transfer of software to cards without additional funds. In them, the micro SD-scale is used as an extension of the internal storage, and the move function is built into the firmware.
To transfer the program from the memory of a smartphone or tablet to a card in Android 6.0 and higher, do the following:
- Open the system settings and go to the " Device» – « Applications».
- Open the menu (properties section) of the required program with a short touch.
- Tap " Vault", Then" Edit».

- In the window " Changing storage location»Select« Memory card».

The instruction is applicable to devices of many brands and models, but adjusted for individual characteristics. Some manufacturers, for example, Samsung, instead of “ Vaults"You need to go to the section" Memory". Others have a button " Transfer toSD»Is located in the very menu of applications that support this function. Well, the third ... just did not bother and refused to implement the transfer function in the firmware of their devices.
The ability to transfer applications to SD-cards "without intermediaries" exists in very old versions of Android - 2.2 and below, and everything that appeared later - up to the sixth version, needs third-party tools, which will be discussed later.
Mobile software for moving applications to SD
AppMgr III

Utility AppMgr III (App 2 SD) it is convenient in that it makes it possible to perform the same type of operations with several objects at once (batch control of the installed software). This is not only a change in the location of the software installation, but also:
AppMgr III simplifies and speeds up many maintenance tasks for a mobile gadget, supports all versions of Android starting from 4.1, but is officially incompatible with devices from certain manufacturers, in particular Xiaomi. Operations with some objects require root privileges.
Link2SD
Exclusive utility feature Link2SD - moving absolutely all user applications to SD cards, even those that do not allow it. The truth about whether the developer guarantees their further performance is not said in the description.

Other functions and capabilities of Link2SD:
- Changing the attributes of custom software to system software and vice versa.
- Freeze unused software.
- Batch transfer of software to SD cards and device memory.
- Batch uninstall and reinstall programs, batch clear cache and data. Clearing the cache of all installed software with one touch.
- Removal of potentially malicious software.
- Device reboot control.
- Create custom shortcuts.
- Sorting installed applications by various parameters, search and much more.
Link2SD is more omnivorous than AppMgr III: it runs on any version of Android starting from 2.3, and Xiaomi devices are generally supported (although, according to user experience, not all). Most operations require root rights, it does not work on some firmware without root. The free version of the utility is pretty good - functional and convenient, but annoying with ads.
Files To SD Card

A simple utility FilesToSDCard is designed to transfer files of different types to a memory card - graphics, video, music and, of course, applications. In addition, it allows you to select the SD card where new files are saved (by default, Android saves everything on the device).
Files To SD Card is used to offload the memory of mobile gadgets and back up data. Despite the fact that the manufacturer claims to support a limited number of devices: Lenovo A2010 LTE, Samsung GalaxyCore, Moto G, Vodafone Smart Prime 6, Nokia One and Sony Xperia M4, the utility runs on almost any smartphones and tablets running Android 5.0 and higher. On most firmwares, everything works without root.
Move to SDCard

A program with an uncomplicated name " Move to SDCard »Pleases users with simplicity and good results. In addition to the main function, which coincides with the name, the utility is able to:
- Move software from card to device memory.
- Sort apps by name, size, installation date.
- Display information about applications: installation location, date, time, size, name of the executable file (apk).
- Search for software on your device and on the Internet.
The utility is compatible with most brands and models of mobile gadgets, including deeply Chinese and very old ones (supports Android 2.3 and higher). Some functions require root privileges.
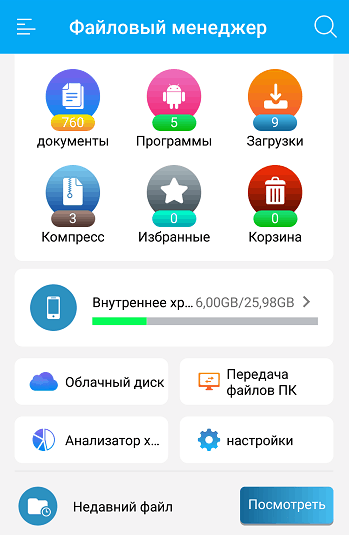
File manager
File manager from Best App developer Is an improved explorer, replacing the standard file manager on smartphones and tablets for Android. Changing the installation location of applications is just one of its functions.
Other features of the File Manager include:
- Copy, paste, cut, move, delete, rename, load - that is, all the standard operations with files and folders.
- Integration with OneDrive and DropBox.
- Access to open resources on the local network.
- Clearing cache, junk data, duplicates.
- Sorting objects by categories.
- Transfer files over Wi-Fi to other mobile devices, computers and Smart TV.
- Analysis and graphical display of storage space utilization.
- Archiving and unzipping files. Support for all major compression formats: rar, zip, 7z, 7zip, tgz, tar, gz.
- Organizing and storing documents of various formats: doc, ppt, pdf and others.
Explorer is very lightweight and easy to learn, not overloaded with redundant functions, undemanding to hardware resources. Runs on Android 4.2 and higher. Some functions need root rights, but everything basic works like that.
All-In-One Toolbox
All-In-One Toolbox - utility for complex optimization and maintenance of a mobile system. The painless transfer of applications from internal memory to SD card and vice versa is also one of its functions.

Other useful features of All-In-One Toolbox:
- Management of software startup (user and system).
- Removing unnecessary data (cleaning garbage, caches, duplicates).
- Complete removal of programs with cleaning of the remaining files.
- Acceleration of the device by freeing RAM from running services and programs.
- Reduced battery consumption.
- Encryption of personal data.
- Displays a list of large files.
- Explorer with the function of sorting objects into categories.
All-In-One Toolbox is a good tool for speeding up and keeping smartphones and tablets in working order with limited resources - small amount of storage and RAM, not the most productive processor, weak battery. Runs on devices of all brands and models, with perhaps a few exceptions. Some functions require root rights and depend on the version of Android.
As often happens, this is far from an exhaustive list of utilities with the ability to transfer applications to an SD card and vice versa. There are hundreds of them, but each with its own quirks and character. I hope this small review will help you find exactly what you like and will also be "tough" for your Android device.