Google Mail (mail.google.com, gmail.com) is a free email from the IT technology leader Google. Thanks to high level personal data security and friendly interface is very popular with users from all over the world.
In the fall of 2012, Gmail.com managed to surpass its main competitor, Hotmail (Microsoft), in terms of the number of users. At that time, more than 420 million people created their account in Gmail.
The Google Mail service (gmail.com) supports two-step authentication, which reduces the risk of account hacking, and blocking for 24 hours in case of detection of unusual activity in the profile. Blocks spam messages. Creates backups correspondence with other users. Transmits data through a secure (encrypted) channel using common protocols (IMAP, POP3, SMTP).
To register with gmail.com, follow the instructions below.
Attention! The mail account can be used to log in to other Google services (Photos, Drive, Maps, News, YouTube, etc.).
check in
1. Type in the address bar of your browser - gmail.com, and then click on the link "Create an account". Or go to the page - www.google.com/intl/ru/mail/help/about.html.
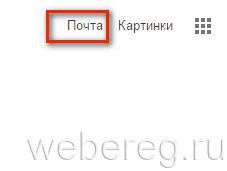
Advice! If you are using a browser Google chrome, on his home page click the Mail icon (located at the top right). Further, to register, fill out a special form.
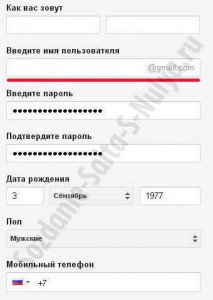
2. "What's your name": your first and last name.
3. "Come up with a username": login to enter the system. When compiling it for convenience and quick memorization, you can use your surname, initials, date of birth or registration.
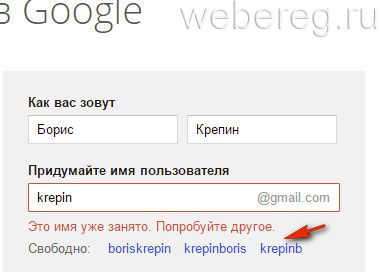
Advice! If the service reports that the login you have created is already being used by another user, to speed up the registration procedure, use one of the generated symbol combinations in the "Free" line. Click on it with the mouse to move it to the field.
4. Create a complex password, at least 12-15 characters long, consisting of lowercase, uppercase English letters, numbers and special characters (&, #, @, $, etc.). Enter the password in the lines "Think ..." and "Confirm ...".
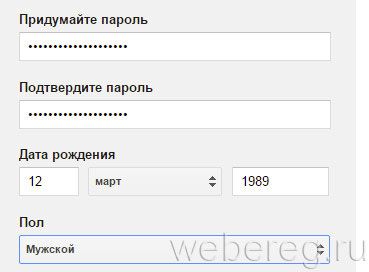
5. Date of birth: manually type the date and year, and select the month from the drop-down list.
6. Gender: open the menu, set the appropriate option (male, female).
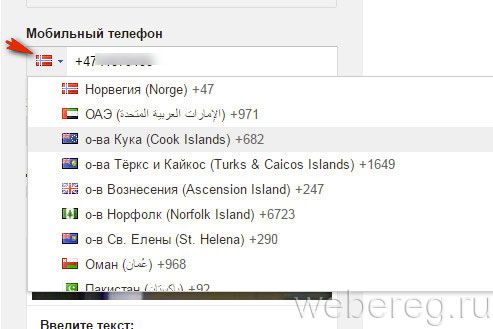
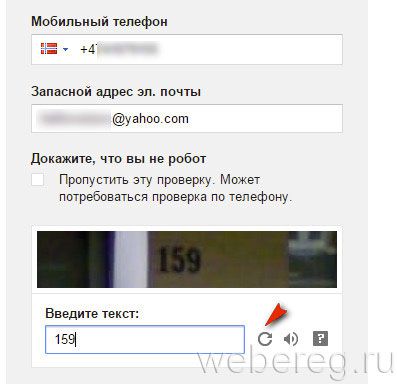
7. Mobile phone: in the list, click the country in which you live to display its international code. Then enter your mobile number.
8. Enter your backup email address (if available). You may need it to restore access to the mail service profile in case of password loss.
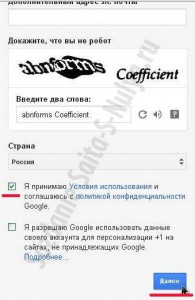
9. Prove that you are a human being and not a bot (a program that performs registration without user intervention): type the symbol combination shown in the picture. If it is difficult to see it, click the "Update" button next to it (the "closed arrow" icon).
10. Check the box in the add-on "I accept the Terms ...".
Verification
1. On the "Confirm Account" page, click the mouse to select the method of receiving the code for verification: SMS or voice call.

2. Click "Continue".
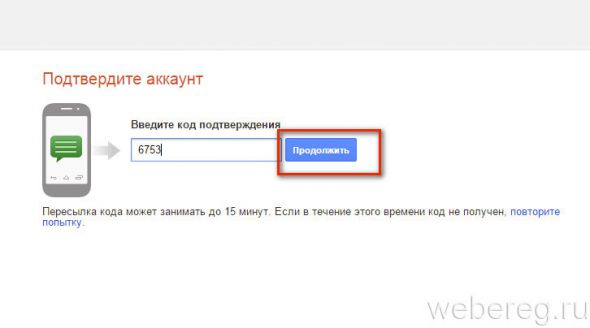
3. Enter the received verification code and click "Continue".
If all steps of the instructions are followed correctly, a page with your mailbox profile will open in the browser.
Gmail settings
1. To open global options google account, left-click on the account avatar in the top right panel (by default, it displays the first letter of the email address). And then go to the "My Account" section.

2. Management by mailbox (viewing letters, spam filter, sending messages, shopping cart, etc.) is carried out in the vertical menu located on the right side of the profile.
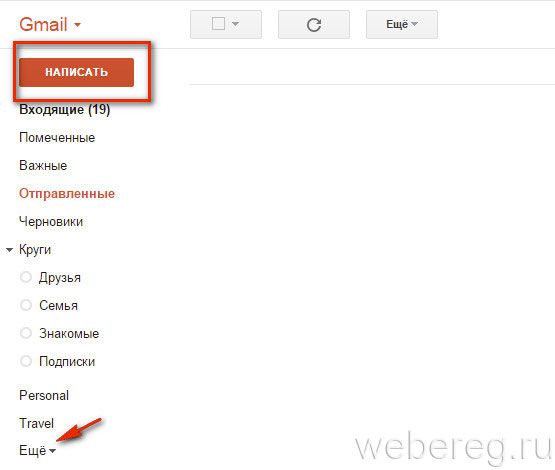
Advice! To send a letter, click the "Write" button. Click "More" in the list of options for more gmail features.
Authorization
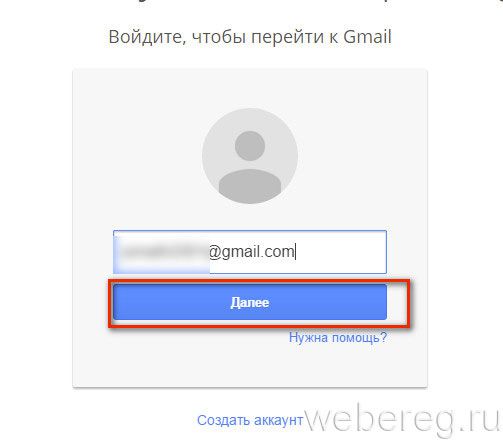
1. Open the page - www.google.com/intl/ru/mail/help/about.html, click "Sign in".
2. Enter the mailbox address in the @ gmail.com format, click "Next".
Enjoy your use postal service Gmail!
Hello Dear friends! You are on the site site, creation and development of which takes place on the air.
Especially for you, I document and publish, from the moment the site was conceived to its present state.
Once, for an urgent solution of business issues, I was looking forward to the information sent to me on box email .
This is not the first time I have used e-mail to get the information I need, and always letters containing it arrived fairly quickly. But not at this time…
Not having received the information I needed so badly, I contacted the sender and asked him to send me a letter again. The result was the same.
The consequences of the events described above were not very funny, I would even say - sad. At the time, I only had one, but after this incident, I registered a few more. But only one of them turned out to be correct, and in the future never let me down.
Reliable email is an essential attribute of every site owner
Today, every person who just gets access to the Internet, first of all thinks about how to create a personal mail. And probably this is correct.
The conditions of today's reality are such that without it it is difficult for us to imagine our existence. Even in order to create personal accounts on such social networks as Odnoklassniki and VKontakte, you will be required to enter an email address, and this is probably correct.
I'm not even talking about the fact that mail will be simply necessary when and, working with, as well as in many other situations on some.
If you have been traveling on the Internet for a long time, then you are probably familiar with the situation described below.
At the next registration on any service that requires further confirmation by e-mail, you are warned that it is better not to use e-mail addresses from certain postal services during registration, since the letter sent to confirm the mail may not reach.
Where, then, is it better to create email correctly, and preferably for free? As a rule, many people have several electronic boxes... For example, I have mailboxes on Yandex, Rambler, Maila and Google.
In most cases, letters arrive to all mailboxes successfully, but nevertheless, sometimes, some of them, letters do not arrive. Some ... But, not email on google!
I don’t know about others, but in my practice there has never been such a thing that I didn’t receive a letter sent to such a box. In my opinion, this mail service is undeservedly bypassed by Internet users.
If you don't have an email address on Google yet, then I urge you to create one there. And in the future, use this particular box, because the confidence that the necessary information will come necessarily and on time is worth a lot. You can create mail on this service completely is free.
How to properly create an email on google, you can learn in a small step-by-step cheat sheet with pictures below.
Register mail on google
So let's go! At the beginning of the first stage, go to the page and click the Mail tab.

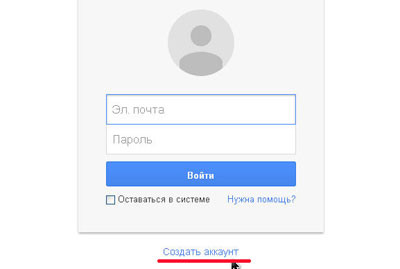
Now you need to click on the inscription Create an account.
Now we have a lot of fields that need to be filled in. But we are not afraid, there is nothing complicated here. In the first two fields, enter your first and last name. If for some reason you do not want to enter real ones, you can enter fictional ones.
In the next field, you must enter the username - this is the name that will be displayed in the email address, that is, the login. For example, if we enter pupkin, the address will look like [email protected]
Next, enter the password twice. Immediately come up with a complex password, that is, consisting of letters and numbers. In this case, it is desirable that the letters be both uppercase and lowercase. When composing a password, it is necessary to strive to ensure that there is no logic in it: it is not necessary to indicate the birthday or the names of relatives as a password.
Better to compose a password by randomly brute-force keys on the keyboard. First, in this way, the password must be created in a text editor (Notepad or Notepad), and then copied and transferred to the password field.
And make it a rule - save all logins and passwords in a separate document indicating the resource to which they were created. Otherwise, you can get confused later.
In the following fields, enter your date of birth and select your gender. Further, if you wish, you can specify a mobile phone number and, if available, an alternative e-mail address.
They can come in handy if we forget the password to the e-mail on google.com. Therefore, for your peace of mind, it is better to specify both, there is nothing to worry about.
In the next step, to confirm that we are not a radish, but right person, in the corresponding field you must enter two words from the picture. If you cannot make out the words, then click on the rounded arrow next to the field and the words will change to others.
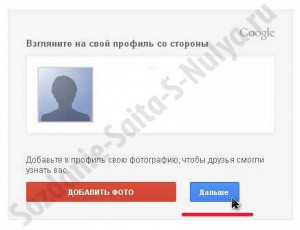
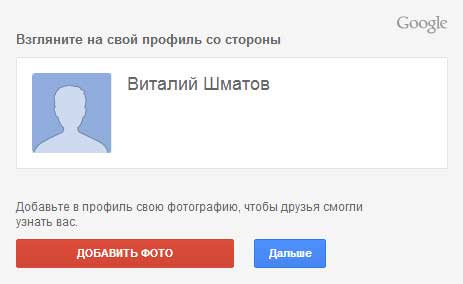
Now we are asked to insert our photo. If you want, then click on the Add photo button and select the place where it is stored on the computer, select it, and it will be in our profile. But this can be done later, so we press the Next button.
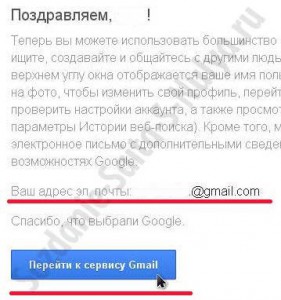
Pam-param! Hurray-ah-ah-ah-ah !!! Everything, e-mail was created absolutely free of charge, and most importantly - right, with which the service congratulates us. Now we can see what our address looks like. Go ahead by clicking the Go to Gmail button.
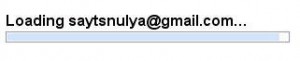
A download line appears in front of us, after filling which we will get to our mailbox.
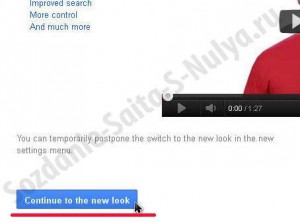
But no! Google is so lucky that we chose it that it wants to talk to us for a bit. If you want, you can listen, or you can skip it by clicking on Continue to the new look.
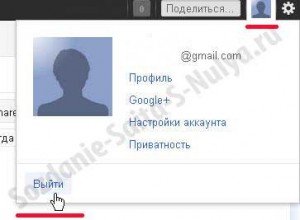
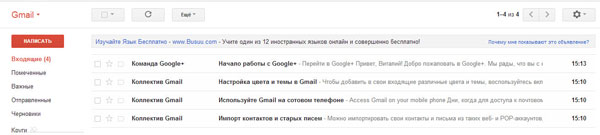
Now we definitely got to our mail. Please note that in the upper right corner is our profile icon with our data. The letters that ended up in our inbox were sent by Google. They do not play a big role, and then they can be removed.

Don't be afraid that the language you know is not enough, now we will fix it. For this it is necessary in the right upper corner click on the gear and in the drop-down menu select Settings, that is, Settings.

Now we have before us a great variety (just a bunch) of settings. We press the tick in the box opposite the inscription Gmail display language and in the drop-down menu we find the inscription with the language you need, in this case "Russian" and select it.

Now we go down to the very end of all the settings and save the changes made by clicking the Save Changes button.

Voila! Now everything is clear to us, unless, of course, we speak some gibberish language that was not on the list :) Now you can delete unnecessary letters. To do this, put a checkmark in front of each of them and send them to the trash bin by clicking on its image above.

All correspondence that came to our mailbox can be found in the Inbox tab, and in order to exit our mail, you must click on our portrait and click on Exit in the window that appears.
That's probably all! Now you know how correctly create an email inbox on google for free, and if necessary, you can do it again, but on your own, and correctly.
I hope the first stage was clear to you. In the same spirit, I will try to consider the following from scratch.
At the next stage, I will talk about the need for an electronic wallet, and show you how, so that in the future there are no problems with transferring and receiving payments.
Did you manage to register your mail, and what problems did you face? Tell us about the difficulties you encountered - perhaps your comments will help someone.
Greetings!
In this article I will tell you how to create mail on google... I will give you step by step instructions in the form of screenshots, what and how to do so that you can create your own personal mail on Google, which you can then use for your needs.
And the needs are different - they are sending and receiving e-mails, using mail to register on sites, services, blogs. Mail is needed everywhere on the Internet. And every person who just went online for the first time is faced with such a concept as Email ( email address). Indeed, wherever a person is and is not on the Internet, everywhere you need to use your mail.
I, too, was once a beginner on the internet. I only knew one thing that there are sites on the Internet where there is various information... Then came social networks, such as Odnoklassniki, Vkontakte, Twitter, Facebook, etc. And everywhere you need your own email. And I had to create a mail on Google.
But, at first I was looking for information on how to create mail, because then I did not know how to do this. This is normal and everyone goes through it and overcomes difficulties, and sometimes they arise often and unexpectedly. Therefore, I studied the material that I found on the Internet regarding the creation of my personal mail.
I found out that there are many mails and each mail is tied to a specific search engine. And currently the most popular mail clients is mail on Yandex and Google. Now I can create mail every day, and this procedure takes me only a couple of minutes. But before I did not know this, and therefore I learned from others who had this experience.
Believe me, this procedure seems complicated and impracticable at first glance, but in fact it is very simple. All you need is to sit down at your computer, go to the Internet and make mail to Google. And I will help you with this.
If you seriously decided to make a howl mail on Google, then below I will give you step-by-step visual information that will give you what you were hoping to get here. And you will receive this information now.
How to create a mail on Google.
First of all, you need to go to the Google search engine at this address https://www.google.ru/. When you load home page search engine Google, a menu will appear at the very top in which you need to find the word Mail and follow the link in the menu.
![]()
After clicking on the Register button, the next page will load, in which your main work on creating mail will take place. Here you will need to enter some data, namely:
in the Name field - you need to enter your name;
in the Last name field - you need to enter your last name;
in the field Come up with a username - you need to enter a name in English letters any name (this name will be the name of your e-mail at the end of registration, so come up with this name beautiful and memorable, since you will show this name everywhere on the Internet);
in the Create a password field - you need to come up with and enter any password that is needed so that you can then go to your Google mail;
in the Confirm password field - you just need to enter the same password that you entered in the Create password field;
in the Date of birth field - you need to enter the day, month and year of birth;
in the Gender field - you need to indicate your gender;
in the Mobile phone field - you can enter your own mobile phone (this field, like the last one, can be omitted).
Below you will be offered a procedure that will check whether you are a robot or a living person, and therefore will offer 2 options for this.
Option 1: You can skip this procedure, but then the postal service may require you to enter a code that will be sent to your phone, and therefore you will need to enter your real number;
2nd option: in this window, enter the captcha (symbols) that you will see on the screen in the required field below these symbols;
in the country field - select your country;
And the last thing you need to do is tick the box that you agree to the terms that Google requires. You can leave the second checkbox unchecked or uncheck it and after that just click on the Next button.
The next step will load a window with your entered profile so that you can look at your profile from the outside. The name and surname you entered and a window with your photo will be displayed here. To upload your photo here, which will then be displayed in your email in Google, you need to click on the Add photo button. Go to this button.
Next, you will see another button called Select files on your computer. Click on this button. You will see a window with files on your computer, where you must select your photo and click OK. After that, in the profile window, in addition to the name and surname, your photo will flaunt.
But, you can not choose a photo, but continue creating mail on Google. To do this, there is a Next button in the profile, on which you need to click. And the next step will congratulate you on the successful creation of a mail on Google, and at the end there will be your real email address on Google. After that, you need to go to the Forward button.

And you will immediately be taken to your mail, where you can already see the letters sent by the Google mail service. On the left there will be a menu for managing letters in your mail. There are also some additional functions and settings here. There is nothing complicated here, and you can see for yourself what's what.
Now, if you want to re-enter your mail on Google (if you yourself accidentally or deliberately left your mail, or the browser did not remember your login details to the mail), you need to go to the Google search engine, find there a menu with the word mail and go to given link.
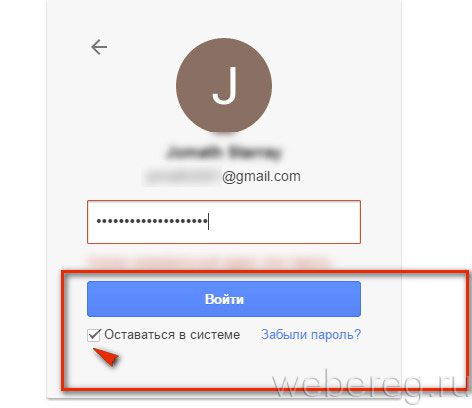
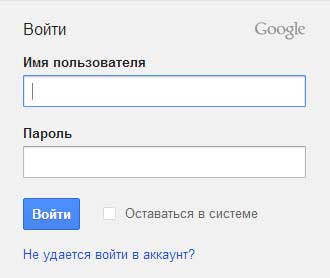
Next, you will have a window as shown in the screenshot below. Here you will need to enter the name of your mail (the name you wrote in the field, come up with a username, that is, the name of your mail) without @ gmail.com at the end. And accordingly, enter the password that you came up with during registration. That's it, then click on the Login button.
By the way, there is such a thing as Staying in the system. What does it mean? This means that if you check this box, then when you close the browser and open it again, you do not need to enter your login and password to your mail, as the browser will remember all this, and you will see the name of your mail in the search engine Google. And you just have to click on this name, and you will be taken to your mail.
But, let's get back to the moment when you want to go to your mail again and accordingly entered the username and password and then clicked on the Login button. You will have the following page loaded as in the screenshot below.
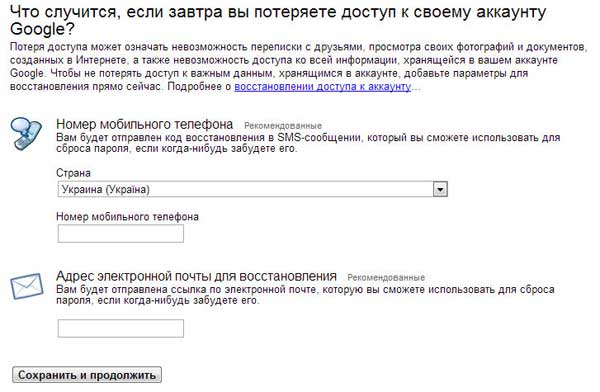
Here you will be offered the opportunity to recover mail in case of loss of data to log into your mail. If you want to use this opportunity, then do it, if not, then click on the Save and Continue button below, after which you will be sent to your mail.
On this I am this article, which I wrote for you, in order to teach you how to create mail on google I'm finishing. I hope that now you have your own mail on the Internet. Finally, do not forget to leave comments.
Video on the topic: How to create mail on Google.