Asus RT-N10 hardware setup
to connect to the Smile network
Beforehand, you need to connect all cables to the appropriate connectors:
- Nutrition.
- Provider's incoming Ethernet cable (to the corresponding WAN port.)
- Ethernet cable from network card to any LAN port on the router. (usually indicated by numbers.)
For Windows XP:
Go to the menu, ![]() , .
, .
In the network connections window (Figure 1), click right click mouse on " "And select" Properties».

Figure 1. Window of network connections in Windows XP.
In the window " Properties of Connection by local network "(Figure 2) select the item" Internet protocoltcp/ ipProperties».

Figure 2. Local Area Connection Properties.
In the window " Internet Protocol PropertiesTCP/ IP»(Figure 3) select:
· « »
· « Get addressDNS-servers automatically»
and click the " OK»

Figure 3. TCP / IP protocol
For Windows 7:
Go to the menu, ![]() ,
,  , .
, .
In the window " Network and Sharing Center»(Figure 4) press ![]() .
.

Figure 4. Windows 7 Network and Sharing Center window.
In the window " Network connections "(Figure 5) find" LAN connection", Click on it with the right mouse button and select" Properties».

Figure 5. Window "Network Connections" in Windows 7
In the window " Local Area Connection Properties"(Fig. 6)) select the item" Internet Protocol Version 4 (TCP/ IPv4) "(WITHOUT removing the check mark) and click on the button" Properties».

Figure 6. Local Area Connection Properties in Window 7.
In the window " Properties: Internet Protocol Version 4 (TCP/ IPv4) "(Figure 7) select:
· « Obtain an IP address automatically»
· « Get addressDNS-servers automatically»
and click the " OK»
Figure 7. TCP / IP Protocol
In order to get to the router's web interface, open a browser, enter the router's ip address (by default http://192.168.1.1) into the address bar and go to this address (Figure 8).
Figure 8. Browser address bar

Configuring with the Installation Wizard
- You are now in the Router Setup Wizard (Figure 10). Click " Further».

Figure 10. Installation wizard
- Click the " Go to manual configuration"(Figure 11).

Figure 11. Determining the connection type
- Select the type of WAN connection « PPPoE"(Figure 12) and click" Further».

Figure 12. Selecting the connection type manually
- Fill in the fields (Figure 13):
- Username - your login to access the Internet (issued by the service provider)
Click " Apply all settings».

Figure 13. Setting up an account
- Wait for the window with the message “ Done!"(Figure 14).

Figure 14. Saving parameters
- Wait until the end of the check of the Internet connection (Figure 15).

Figure 15. Testing the Internet connection
- In the next window (Figure 16) fill in the fields:
- SSID - name wireless network (you need to come up with yourself, later it will help you distinguish your network from strangers)
- Network key - a key to access the wireless network
Click the " Complete».

Figure 16. Configuring the wireless network
- Wait for the window with the message “ Done!"(Figure 17). Until now, do not de-energize the router under any circumstances!
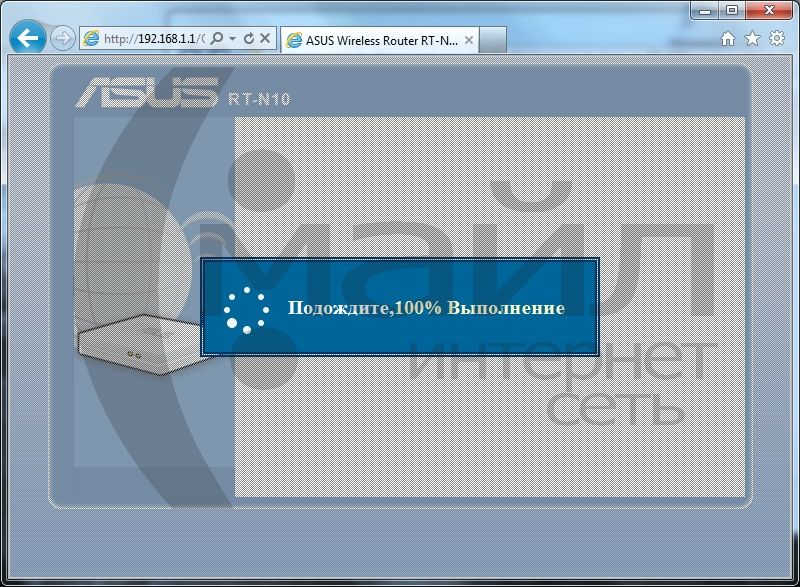
Figure 17. Saving parameters
- Subsequently, the result of the setting will be displayed (Figure 18). Click " Going to the Internet»To start using the Internet.

Figure 18. Completing the configuration
Your Internet routerAsus configured for pleasant work in the Smile network!
Configuring Internet Access Manually
To manually configure Internet access:
- In chapter " Additional settings"Select" WAN"(Figure 19). For the parameter " A typeWAN-connections"Select the value" PPPoE».

Figure 19. Manual configuration of the Internet connection - Connection type
- Fill in the fields (Figure 20):
- Username - your login to access the Internet (issued by the service provider)
- Password - your password to access the Internet (provided by your service provider)
Click " Apply».

Figure 20. Manual configuration of the Internet connection - Authentication
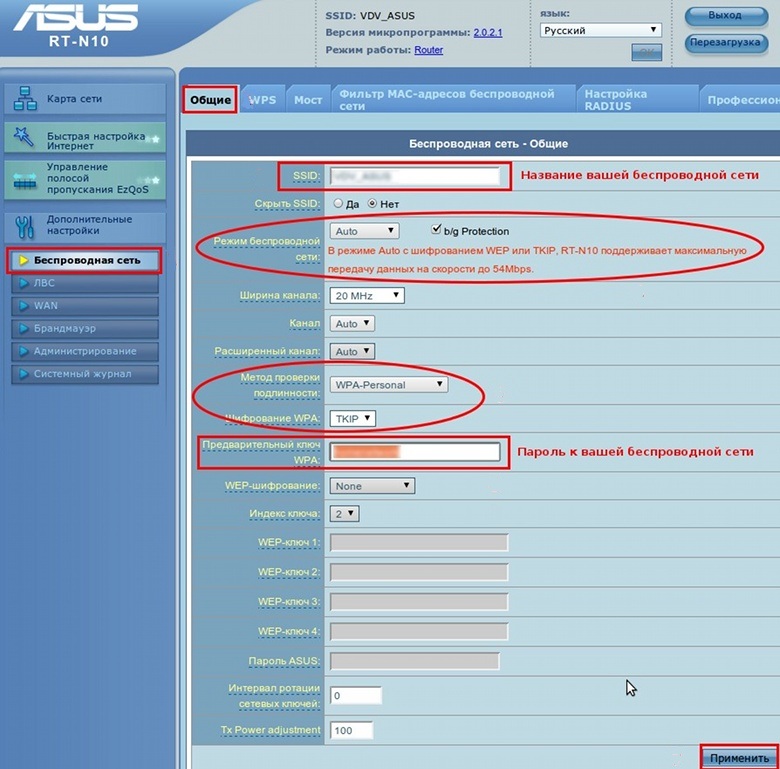
Manual Wireless Configuration
To manually configure your wireless network:
- Go to the router's web interface.
- In chapter " Additional settings"Select" Wireless network"(Figure 21).
- In field " SSID»Specify the name of the wireless network (you need to come up with it yourself, later it will help you distinguish your network from strangers).
- For the parameter " Authentication method"Select the value" WPA-Auto-Personal».
- For the parameter " EncryptionWPA"Select the value" TKIP+ AES».
- In field " Pre-keyWPA»Specify the key to access the wireless network.
- Click " Apply».

Figure 21. Manual configuration of the wireless network
Changing the password for the web interface
To improve the security of your work on the Internet, we recommend changing the password for accessing the router's web interface. For this:
1. In the section " Additional settings"Select" Administration", The tab" System"(Figure 22).
2. In the window that opens, you will need to specify “ New Password"(The password that you will later use to access the router's web interface) and" Re-enter new password»(Accordingly, you will need to re-enter the new password to access the router's web interface).

Figure 22. Changing the password for access to the router's web interface
Magazine
You may also need data from the router log (log). In order to get this information, go to the section " Additional settings", Paragraph" System log", Tab" General Journal"(Figure 23).

Figure 23. System log (log) of the router
Over the years, users have become convinced of the high quality of the electronics manufactured by Asus. In terms of cost / quality ratio, the Asus RT N10 router is one of the most optimal solutions when creating a Wi-Fi network in a small office or home. In this article, in addition to the description asus models RT N10 provides a step-by-step guide to setting it up. Following the indicated sequential steps of the instruction, any even a novice user can competently complete the entire connection and configuration procedure in no more than 20 minutes.
Description of the device
The Wi-Fi N router has an EZ UI interface. The device provides data transfer rates up to 150 Mbit / s. No installation needed special drivers for the full functioning of the device. Network management processes have been greatly simplified. You can create two wireless wifi network with just one Asus RT N10 router.
Basically all currently produced wireless routers significantly reduce the speed of data transfer over Wi-Fi, but the Asus RT N10 router has the functionality to provide speed when working in a global network is almost identical to a cable connection.
The manufacturer did not forget to work out well the laconic design Wi-Fi devicesthat will appeal to even the most picky users.
Despite its compact dimensions, the Asus RT N10 router provides high-quality and stable signal transmission and has a significant range. The device implements the function of distributing the Internet via Wi-Fi and, in addition, Asus RTN-10 can connect computers without a Wi-Fi adapter to the World Wide Web via a wired Ethernet connection, since the device has 4 LAN connectors for this purpose.
Connection procedure
The sequence of actions is as follows:


Opening the settings menu
In order to enter the settings of the Asus RT N10, you can use the following two different methods:
- Connecting the computer to the router with a patch cord (recommended method). This cord is included with the device. One of its plugs must be inserted into the "LAN" socket of the Asus RTN-10, and the other into the socket of the computer network card;
- Connecting to a router using Wai Fay. If the PC does not have a connector for a patch cord (for example, Apple laptops do not have them), then it will be necessary to configure all the parameters using a Wi-Fi connection.
Patch cord connection
This method provides access to the settings of the router without searching for a Wi-Fi network and a set of access codes. You just need to make sure that the properties in the TCP / IPv4 protocol are correctly set on the PC. Everything should be the same as shown in the following picture: 
Wi-Fi connection
It is required to carry out the following sequential actions:

Setting procedure
Further actions after the implementation of the connection process for both methods will be the same.
The procedure execution algorithm consists of the following stages:
- Open a browser and print the router's IP "192.168.1.1";
- Then after pressing "Enter" a menu will appear in which you need to type the name and access code. If they have not been changed, then in both fields you need to type "admin". And if the new Asus RT N10 router has already been used and the owner changed the parameters, then most likely you know the password yourself, or you will have to reset the device settings by clicking on "Reset".
Note: in the case of the 1st asus connections RT N10 the above steps are not necessary, because after starting the browser, the installation application will automatically enable the configuration utility.
Quick setup
If the settings window is opened with the built-in utility, the menu will immediately appear quick setup... First, the app will recommend changing the access code.
 Then there will be simple instructions after execution, which you need to click on "Next", thus moving from one window to another. You will need to specify the type of connection, for example, dynamic IP. This information must be taken from the documents of the Internet service provider. At the final stage, the user is required to come up with a name for his Wi-Fi network and an access code to it. Then the device will restart and you can start working on the World Wide Web.
Setting procedure in the main interface window
If the main menu for entering device parameters is opened, do the following:
Setting up an Asus RT N10 router is a fairly easy process that does not require any mental effort and special knowledge. This quality is distinguished by almost all modern routers intended for home. Asus routers have a familiar and intuitive interface. A standard username and password and similar algorithms make the router easy to use and do not cause problems for users who have switched from other devices. (fig. 1)
Figure 1. The Asus RT N 10 router has high speed transfer and quite reasonable price.
Among its other advantages, this wifi router offers an easy opportunity to update its firmware, and not only to the official one. People with knowledge in the computer industry will be able to download the firmware that fully meets their requirements, or even write one themselves.
Setting up a router
Before tackling the router settings, you must first connect it correctly. (Fig. 2) In short, you need to plug the cable of your Internet provider into the blue connector on the back of the device, the cable that comes with the router, the other end of which is connected to the computer, into any of the yellow ones, and the charger to the black and round connector ...
Before setting up the Asus RT N10U router, it does not hurt to reset the factory settings. To do this, find a small button next to the connectors, hold it for 5-10 seconds and release it. After that, all that remains is to reboot the router, disconnect it from the power supply for a few minutes. Now, so that you can configure the Asus RT N10 router, you will have to:

Figure 1. Location of ports on an Asus router.
- Provide the ability to obtain an IP address and change the DNS server to "automatically". You can do this in Start - Control Panel - Network and Internet - Network and Sharing Center - Change adapter settings - Wireless connection - Properties - Internet Protocol Version 4 - Properties.
- Open your browser and type 192.168.1.1 in the address bar. If there is nothing at this address, reset your device and restart your computer. This can happen with older models. Enter instead of the login and password the standard admin for all routers.
- Install on top, almost on the "header" of the interface, the language "Russian". Thus, it will be easier and clearer to work.
- Call your provider's tech support. Ask him which of the options to choose: static address, dynamic or PPPoE. Also ask and write down the IP address, subnet mask, first and second DNS server, default gateway. After getting this information, go to the side menu item called "Advanced Settings" and select WAN.
- Configuring the Asus RT N10P router and any other from this line when choosing a static and dynamic address requires care. In the type of connection, you must select one of these items, depending on the answer of your provider. After that, enter all the data that you learned in the appropriate fields. These fields have special signatures. If you failed to find them out, set the receiving to "auto". Then enter your MAC address in the bottom field. You can find it out both with the help command line, and using a variety of programs and even sites. Click on "Apply".
- Configuring the Asus RT N10P router with the latter option is equally easy. In the connection type, you need to select the coveted PPPoE. Mark the third line from the top as "yes". Just as in the previous paragraph, enter the address, server and mask in the fields below. The next three fields are responsible for the login and password with which you previously connected to the Internet. And, as before, you can enter the MAC address if necessary. After that click on "Apply".
- Go to Wireless Network - General. In the first field, enter the desired name for your network. Set the channel width to 40. In "Method ..." set WPA-2, below - AES, and in the next field enter the password for accessing the network.
- The Asus RT N10E router allows you to change the transmitter power. This is done using the following items: Wireless Network - Professional.
- Go to the "Administration" - "Restore ..." tab. Next to the inscription "Save settings" click on the "Save" button.
Now your Asus RT N10U router or any other from this line is fully configured and ready to go.
How do I set up additional features?

The connection status is in the main menu of the program.
Many Internet providers offer many additional services, both completely free and requiring certain investments. One of the most common is television, which also needs to be re-configured when switching to a router.
When setting up an Asus RT N10U router, you need to perform just a few simple steps. Enter the graphical interface of the device in the same way. Select "LAN" in the menu item, go to the "Route" tab. In the next two lines, about routes and routing, you need to set "Yes". At the bottom, select from the drop-down item "LAN" and, finally, click on the "Apply" button. After that, go to the menu item "Wireless" - "Professional". There will be an item "Multicast data transfer rate", from the list you need to select a value in the range from 9 to 12 and click on "Apply" again.
If you need to configure the Asus RT N10E router, it all comes down to an even simpler sequence of actions. In routers of this model, all the items necessary for setting up Internet TV are placed in a separate IPTV tab in the menu item. Set all parameters in the same way as in the previous case. The Asus router, among other things, also has a single USB port. It can be used to connect to a printer that is configured through the same graphical interface. To do this, the printer must be disconnected from the power supply. After that, run on the computer the disk that comes with the printer. It contains several programs. Among them, you need to select Asus Wireless Utilities and open it.
Then select Run Network Printer in the window. The next window prompts you to check if you have connected everything. The computer must be connected to the device, and the device itself must be connected to your router. Then click on "Next". Nothing else is required of you. The Asus N10 router will automatically connect to the printer in a few minutes. True, before performing these actions, you should make sure that the router is compatible with your printer model, since such manipulations can not be performed with every model.
The Asus RT N10P router does not differ in special features, so no additional settings are required from it.
How to set up Asus DSL N10 router?
This line is the line of Asus DSL N10 ADSL routers, similar to the models described above. The graphical interface and the setup algorithm itself are also similar, so a person who switched from an RT N10 router to this model will be able to figure out the settings on their own. All that is required from you is a few fairly simple steps, but before that, make sure you have everything connected correctly. This is just as easy to do. Installation instructions with pictures are included with the device.

Counting from right to left, the first four connectors on it are for connecting to a laptop or computer. This can be done with wireless internet, but it's more reliable. The fifth is plugged into an Internet cable, and the last is for power.
- In the address bar, drive in one of the following addresses: 192.16.1.1, 192.16.0.1, 192.16.0.10. If none of them fit, look on the back of the router.
- Print the standard username and password as before.
- Go to "Additional settings" - "WAN" - "Internet connection".
- Nothing else is required of you. All information about your Internet is entered on this tab. And what exactly to write should be dictated to you by your provider. Be careful: just a single missing or extra digit - and the Internet will no longer work.
As you can see, the process of setting up this router is even easier than the previous ones. Almost no action is required from you - just mindfulness. Now you know how to set up an Asus RT router. In fact, this is a fairly simple procedure.
Modern manufacturers of networking equipment care about their users and make for them an understandable interface translated into many languages.
With a little tinkering, you can enjoy great internet.
We can safely say that the setting asus router rt n10 is not difficult, almost anyone can figure it out, but for those who could not do it all the same, I will describe step by step what needs to be done. I can tell right away that this model The asus router is quite good and has shown itself quite reliably over the years. In order for us to start setting up, you need to find out from your provider or look in the act, or in the service agreement, all the necessary parameters of your Internet connection.
The standard connection types are PPTP, L2TP, PPoE, Static IP, Dynamic IP. Depending on the type of connection, you will need different data, I hope your provider will help you with this and tell you all your data. If you still do not cope, there will be a special article devoted to this issue.
And so let's start, connect the router to the electrical network and connect your computer and the router using a patch cord (a small wire crimped on both sides) by inserting one end of the wire into the Ethernet port on the computer, and the other into any of the 4 LAN ports (only not in any case not to the WAN port!). Then two indicators should light up: power supply and against LAN port... We made the physical connection and now, in order to configure the asus rt n10 router, we will begin to climb into the brains of the router.
Login to the router control panel
First of all, launch any browser you like: Internet Explorer, Opera, Google chrome and others. In the address bar, enter the following ip-address 192.168.1.1 and press the Enter button. A window will appear requiring you to enter a login with a password, if the router is configured for the first time, then you must enter the same login and password - admin, if not, you have to reset the router settings to factory settings. To do this, you need to press and hold the reset button for about 15 seconds, which is located in the back in a small hole (use a toothpick or pen). Having done everything right, the router interface will appear in front of you.

Setting up the Internet on a router
And now wifi setting Asus router proceeds to the next step - Internet connection settings. Before our eyes is the interface of the router, if you did the previous steps correctly. Let's start configuring:
- On the left, click on the "WAN" section;
- Click on the "Internet Connection" tab, if it did not open initially;
- In the drop-down list "WAN connection type" select the type of connection that you have;
- In the sections “WAN IP address setting”, “WAN DNS setting” we select automatic or not, depending on your connection type;
- In the sections "Setting account"And" Special requirements of the Internet service provider "enter your data, if required in your type of connection;

Wifi setup
Now let's start configuring the wireless connection. First, you need to take into account the fact that setting up an asus wifi router has some nuances that we will analyze. And so let's get started:
- Go to the "Wireless network" section of the menu;
- In the SSID item we indicate the desired name of our future network (in Latin numbers);
- In the wireless network mode, select "B only" or "G only", depending on which devices will connect to the router in the future, I do not recommend using the mixed type;
- Change the broadcast channel of the wi-fi signal from automatic to a specific one, for example, 6 or 9;
- The authentication method is better to put WPA-Personal;
- WPA encryption is set to TKIP;
- The WPA pre-shared key will be your primary password, come up with and enter it, but don't forget to write it down in your notebook;
- Press the "Apply" button and wait for the router to restart.
After rebooting the router and applying the settings, try to connect to with a howl wifi network with the password that you previously wrote down and enjoy the Internet. I hope that this setting of the asus wifi router will not cause you any difficulties, I tried to present the material as clearly as possible.