Among the programs that appeared after installing the package Microsoft Office 2007, there is also a program called Microsoft Office Outlook. What is this app? It is a powerful program for organizing your working day. She will tell you everything - about appointments, birthdays, letters ... It is about letters that will be discussed in this article, namely, how to set up Microsoft Office Outlook 2007 to send and receive letters. So, let's take a step-by-step look at how to set up an account. mailbox in this program.
Setting up an email account
Let's start Outlook.
Usually Outlook 2007 is available in the menu and replaces the standard Outlook Express with its shortcut.
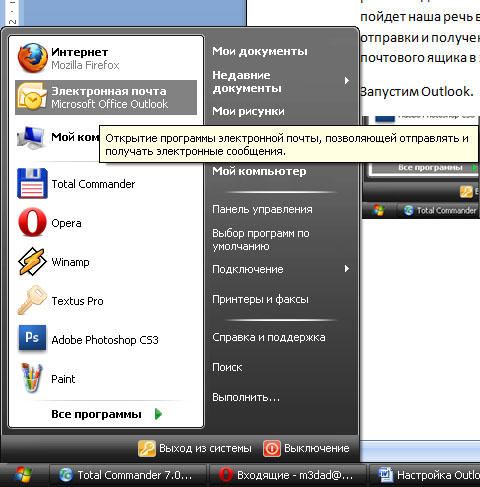
Outlook 2007 starts by showing mail. Just for it to show mail, you need to set up an account. To do this, click "Service -\u003e Account Settings".

The next window opens, where there is only one active button "Create". Click on it.
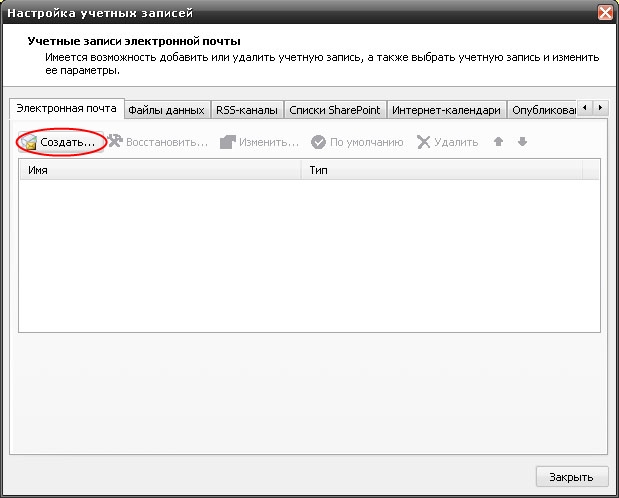
When setting up the program for the first time, there is only one active button in this window
In the window that appears, enter your data, namely "Your name", by which the program will recognize you, "Address email"," Password "and" Password check ".
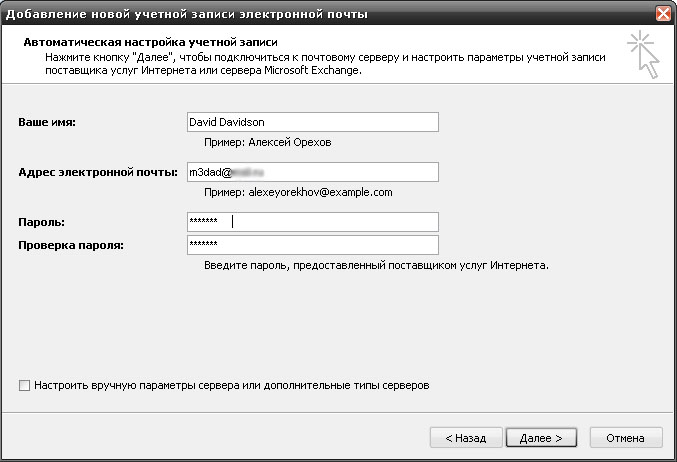

If all the data is entered correctly, and the Login to the server is “decorated” with a check mark, the Next button will become available. Outlook 2007 will automatically start downloading emails from your mailbox. Then you can view letters, reply, delete, i.e. use the program as it is convenient.
When you need to download letters to your computer, press F9 or on the "Send and Receive" button (the triangle with the tip down - the context menu of the button, where you can specify more specifically what you want to do).
Configuring Email Servers
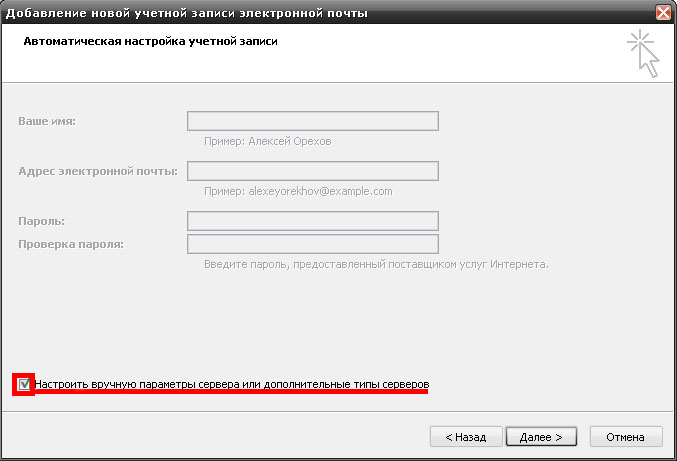
If you need to configure your mailbox yourself, because Outlook's automatic settings are not always correct, you can set up your mailbox differently. To do this, select "Service-\u003e Account Settings", in the window that appears, click "Create", in this window (at first a window with a server selection may appear - do not change anything, click "Next") put a tick in the box "Manually configure server settings and additional types of servers "and click" Next ".
In the "Server selection" window that appears, do not change anything, click "Next" and proceed to adding a new account.
Now we enter all the required data. For ease of use, I will give a table of known mail servers (SMTP, POP3 servers).
| Website | Incoming mail server (POP3) | Outgoing mail server (SMTP) | Yandex.ru | pop.yandex.ru | smtp.yandex.ru |
|---|---|---|
| Mail.ru | pop.mail.ru | smtp.mail.ru |
| Rambler.ru | pop.rambler.ru | smtp.rambler.ru |
| Google.com | pop.gmail.com | smtp.gmail.com |
Note: For yandex.ru to work correctly, you need to log into your mail account, click on the Settings button, scroll down the page, click the Mail programs button, in the window that opens, check the From server pop.yandex.ru using the POP3 protocol and save the changes.
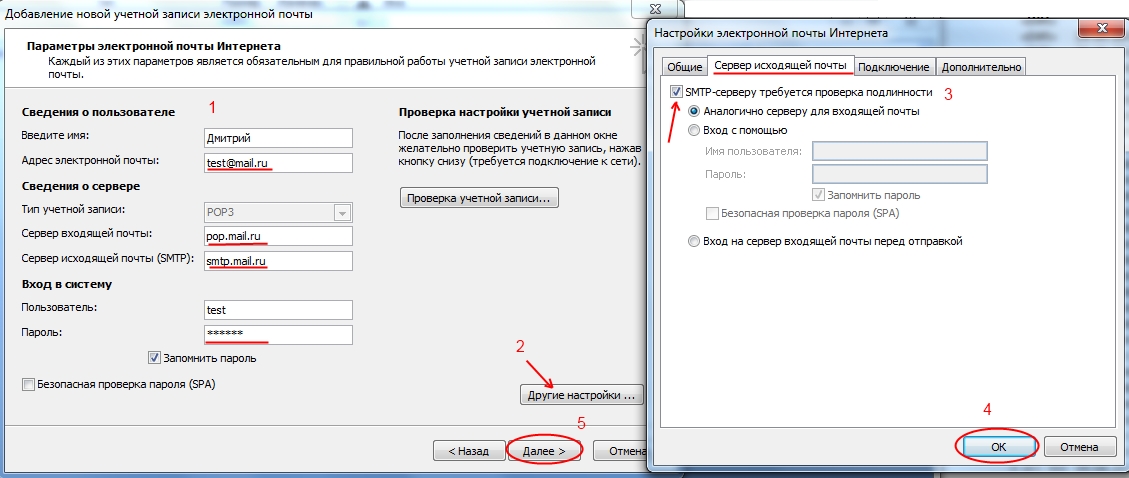
You entered your data. Now click on "Other settings". In this window, in the "Outgoing mail server" tab, fill in the "SMTP server requires authentication" column, and just below "Similar to the incoming mail server" (Gmail requires just such settings, but there may be other options for another mail site). In the "Advanced" tab, select "Requires an encrypted connection (SSL)". Click OK, Next.
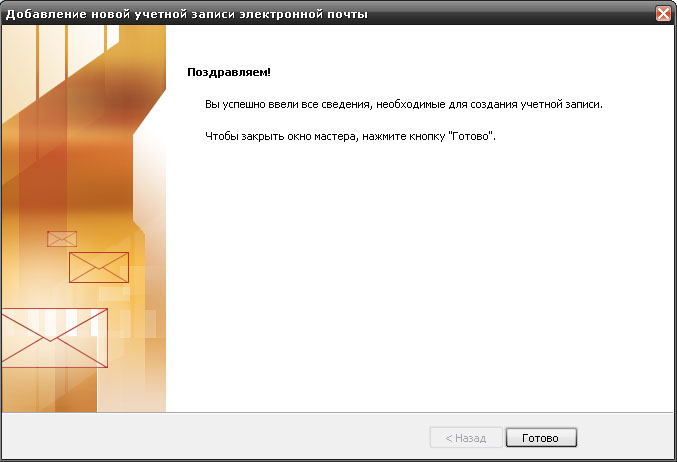
By clicking the Finish button, the program will automatically download letters from your mailbox. That's all, now the setup of your account in MS Office Outlook 2007 is completed, now you can use your mailbox.
Setting up an email account. Video
Microsoft Outlook is the most popular email program. This is primarily due to the simplicity and ease of use in it, as well as the presence of Outlook in the Microsoft Office suite of programs. This email client is focused on office use, but it is also very well suited for working with mail at home.
Setting up Outlook is quite simple thanks to the successful intuitive interface of the program. All options mail client moved into a single settings window, which is opened through the "Options" item of the "Service" menu. If you have an antivirus installed Kaspersky Internet Security, this settings window will also display the mail antivirus and anti-spam settings that KIS integrates into Outlook.
The settings window is divided into several tabs, in which the program parameters are grouped.
On the " Settings "in the" E-mail "group of parameters there is a button for configuring spam settings. Outlook has a built-in spam filter that tries to determine if a received message is spam based on certain criteria and, if the verdict is positive, moves it to the spam folder. In this window, you can adjust the filtering level, and also disable it.
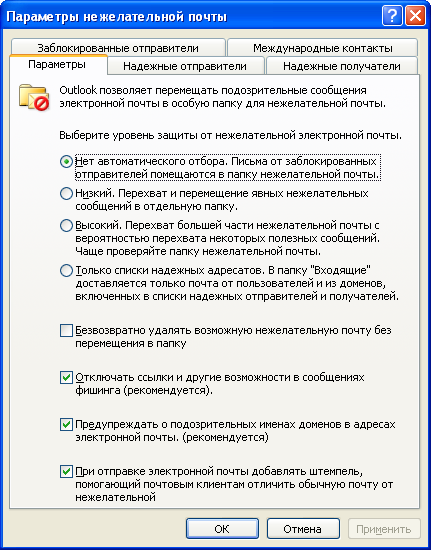
If you select the option "Permanently delete possible junk mail without moving to the folder", all messages identified as spam will be deleted permanently. However, before including this opportunity it should be remembered that no matter how bored you are with spam, the filter does not always correctly identify unwanted messages. There are times when he misses spam, but there are also the opposite situations - a letter that is not spam is defined as unwanted. If you enable the function of permanently deleting unwanted emails, these criteria may also include quite normal emails, which will also be deleted.
To prevent emails from some senders from being marked as spam, you can add them to Safe Senders. Accordingly, you should add addresses to blocked senders, messages from which should always be marked as spam.
The "Mail Options" button allows you to configure the handling of received messages.
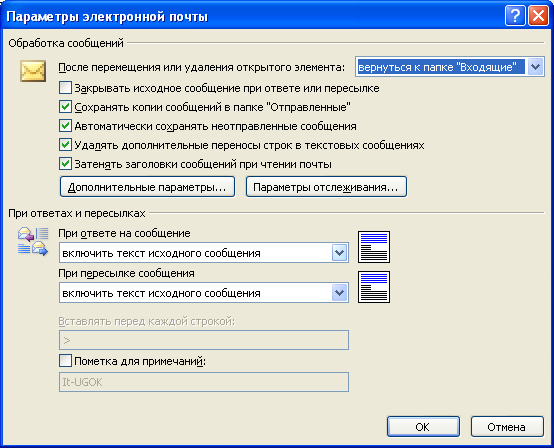
The "Close original message when replying or forwarding" option closes the open message window after the "Forward" or "Reply" button has been pressed and the message has been sent. In general, a convenient option - saves the user one extra click on the window close button.
The option "Save copies of messages in the Sent folder" is enabled by default to keep track of all sent messages in the future, which will be automatically saved in the corresponding folder. But the option "Automatically save unsent messages" includes the ability to save all created but unsent messages in drafts after closing the window for creating a new message.
The "On replies and forwards" group of parameters allows you to customize the content of a message sent in response to a received message or when forwarding a received message. From the drop-down list, you can choose whether to include the text of the original message in the sent one, mark the original text with special icons, etc.
The "More Options" button opens the window even more fine tuning Outlook 2007.

Here you can specify how long and in which folder to automatically save a new (currently created) message. This is necessary in case of unexpected failures in the OS or Outlook itself. It is also convenient to configure the behavior of the program when a new message is received - beep, change the appearance of the mouse pointer, display a tray icon. In addition, it is possible to issue notifications on the desktop - they are configured by pressing the corresponding button.
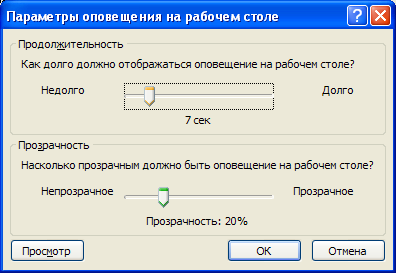
The duration of the message and its transparency are indicated here. The pop-up message itself will indicate the subject of the email and the sender.
When sending a letter, it is often necessary to find out whether the letter was delivered and / or read by the recipient. For this in Outlook 2007 there are tracking parameters... These include a delivery receipt and a read receipt. The difference between them is that the delivery notification is sent to the sender by the recipient's mail server as soon as the letter arrives at it. But this does not mean that the addressee received it - this is only a signal that the letter has been placed in the appropriate folder on mail server recipient and as soon as he starts his mail program - the letter will be received by him. A read receipt is sent by the mail program itself when the letter is opened (more precisely, when it indicates that the letter has been read). This parameter is more reliable than DSN. To insert a service parameter into a letter, you must select the appropriate option in the window for creating a new letter on the "Parameters" tab. However, in the Outlook settings, you can specify to use these settings for all messages sent. To do this, click the Tracking Options button in the above mail settings window.
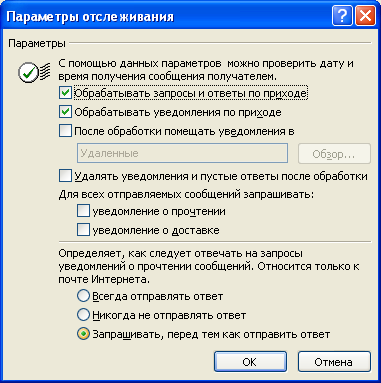
Here, in the options "For all sent emails, request:" you can specify the desired tracking parameters that will be automatically enabled for all emails.
If the recipient receives a letter in which the sender specified the Read Receipt parameter, Outlook will ask whether or not to send such a notification. In the settings of the above window "Determines how to respond to requests for read receipts ...", by default, the option "Ask before sending a response" is specified. However, you can force the program to automatically send or never send a response to such requests by setting the switch to the appropriate position.
Tab " Mail setup "Outlook 2007 docker" Allows you to configure the settings for sending and receiving mail.
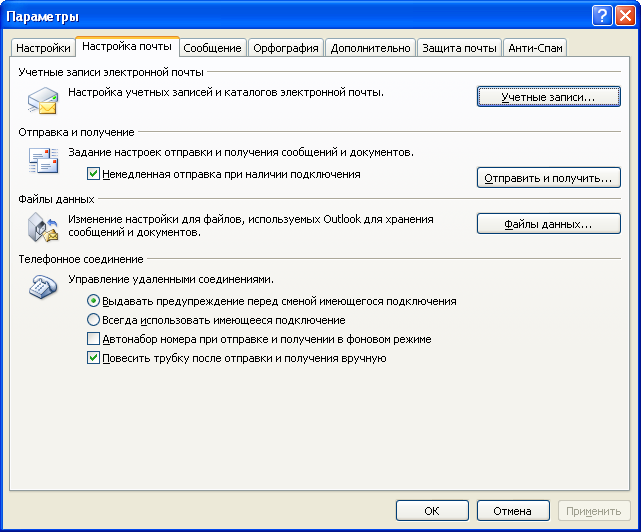
To do this, click the "Send and Receive" button.
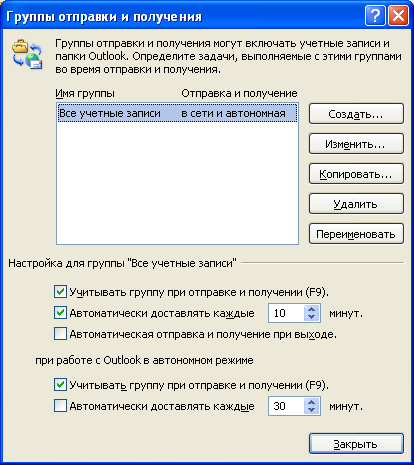
Here, in the "Settings for the" All accounts "group of parameters, specify in the" Automatically deliver every ... "option the number of minutes after which Outlook should automatically check for new mail... Naturally, it should be running at the same time. However, it is not always convenient when a constantly running program "hangs" on the taskbar. You can hide it in the tray. To do this, click on the Outlook icon in the tray and select the options "Hide minimized" and "Show desktop alert for new emails".
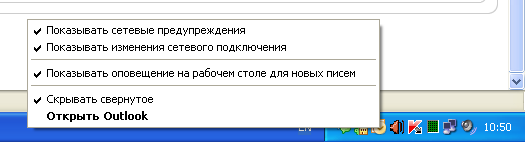
Configuring Outlook 2007 in this way - specifying automatic mail checking at short intervals (5-15 minutes), displaying notifications on the desktop and hiding minimized ones - allows you to start Outlook once, minimize it, and then access it only as new ones arrive. messages, which will be notified with a sound signal, an envelope icon in the tray and a pop-up message on the desktop. The rest of the time, the program will "quietly sit" in the tray and not interfere with working with other software.
On the " Message "in the Outlook 2007 settings window, you can customize the appearance of a new letter created in the program, as well as the appearance of forwarded letters and replies to received messages. To do this, by clicking on the" Fonts and Stationery "button, select the subject you like from the list and the appropriate fonts.

When sending letters, especially in business correspondence, it is convenient to sign letters. In order not to manually sign each new letter, you can create several signatures and they will be automatically embedded at the end of the new letters you create. To do this, click the Signatures button on the Message tab.
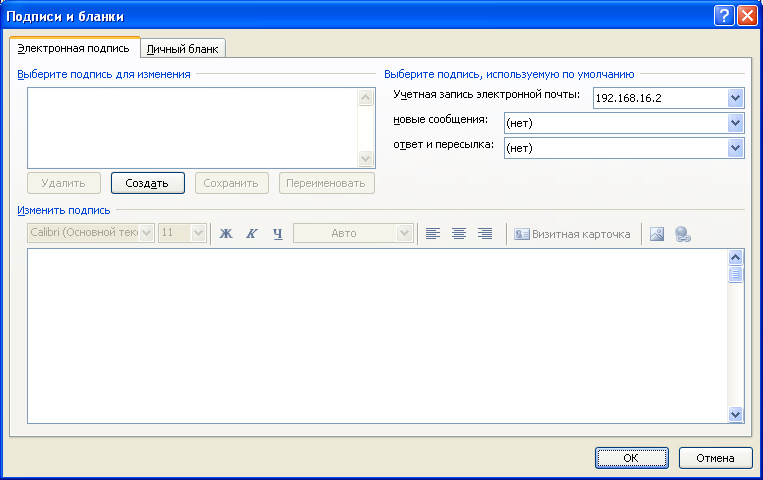
Click "Create" to create a new signature. Give it an arbitrary (but understandable) name, in the area below, enter your signature text. There can be several signatures, but the one that is defined as the default signature will be automatically embedded in the letter. Moreover, in this window, you can configure the default signature for each mail account, as well as specify whether to use it only for new letters or for replies and forwards (drop-down lists on the right side of the window).
Tab " Spelling "provides spelling settings for sent emails.

It is better to leave the option "Skip the text of the original message in the reply or when forwarding" enabled in order to save yourself from the need to correct errors in the texts of letters sent to you, to which you are responding or forwarding. If you want to be sure that the letter you send will always be free of errors - enable the "Always check spelling before sending" option - even if you do not explicitly check the letter for errors, such a check will be performed automatically when the letter is sent and the message will be sent only after correction (or explicit omission) of all errors in the text. Clicking on the "Spelling and Replacement" button will open a window with spell check options. However, its default settings are the most suitable for most cases.
After you have registered your mail account for efficient and convenient work with your correspondence, you need to use special mail programs that make our life much easier.
In this article I will walk you through the process of setting up a mail microsoft programs Outlook Express and describe in detail all the steps required for this.
At the first starting Outlook Express we see the following window:
The first thing we need is to enter our name in the name input field, here you can enter any name or nickname you like. It will be displayed in the From field of this letter.
After the name field has been filled in, the "next" button will light up, click on it and see the following window:
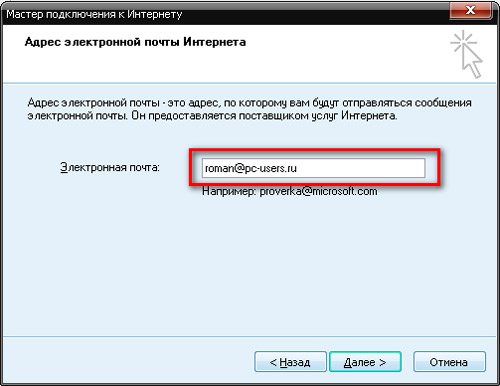
here, in the field for entering the e-mail address, we enter the e-mail you registered, here it is important to enter it accurately. After entering the address, click "next" and get to the next window:
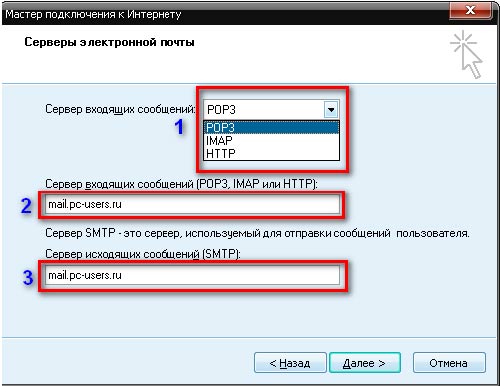
In the field for selecting the server of incoming messages (1), as a rule, the POP3 protocol is most often used. So, first, select it, in case of an error, try to select another protocol, IMAP for example. POP3 is used to store the mailbox on the user's computer, and IMAP is used on the server.
In the field (3) server of outgoing messages, you must also enter the address of this server.
In my case, the data for the incoming and outgoing server is the same, but this is not always the case, as a rule, they are different.
After entering all these data, go to "next". Please note that all these three fields are required, moreover, the performance of your mailbox will depend on how correctly you fill them in. Therefore, here you need to enter all this data correctly.
After the transition, we get to such a window:
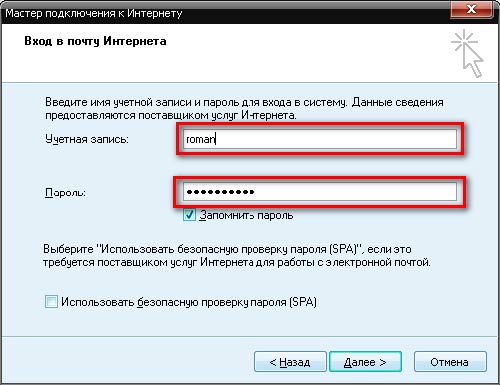
In the field "account" we enter the username you have chosen, to enter the mail, as a rule, you basically only need to enter a username, but in some cases it is also necessary to enter a domain, for example: [email protected]site, here it is already individually. But first, I recommend trying to just enter the login, without any domains.
In the "password" field, enter the password you invented, you can also check the "remember password" checkbox so as not to enter it constantly. Let's move on. The following window appears in front of us:
![]()
where we are congratulated on successful mail setup. We press "done". And we check the efficiency of the mailbox. To check the mailbox, you must press the key combination Ctrl + M or press the key:

or choose Tools\u003e Deliver Mail\u003e Deliver Mail.
Any difficulties, questions? Write in the comments. How can I help.
This article describes in detail the procedure for configuring mail microsoft client Outlook 2010. Settings to be configured for the new account:
- outgoing mail server, incoming mail server: mail.YOUR_DOMAIN ;
- username - full name of the mailbox: NAME @ YOUR_DOMAIN ;
- password - was set when creating the mailbox;
- the outgoing mail server requires authentication, the data is the same as for the outgoing mail server.
Let's consider the setup procedure in more detail.
- In the ribbon, you must select the tab " File", click on the " Setting up accounts»And select the item of the same name in the drop-down list:
- In the window that opens, click on the button " Create a» :
- In the "Add a new account" window, select the item " Manually configure server settings or additional server types»:
- In the next window, you must fill in all the fields. In field " Enter your name»You need to enter a name that will be substituted in the templates of outgoing letters. In field " E-mail address»You need to enter a custom email address, under this name the custom mailbox will appear in the mailbox list in Outlook. Next, you need to decide whether you will store the correspondence on the mail server (" Account type» - IMAP) on either local computer (POP3). Be careful, after creating an account it will be impossible to change its type.
- Next, you need to configure your incoming and outgoing mail servers and login credentials. If your domain is parked to our hosting - you can enter in the fields “ Incoming mail server"And" Outgoing mail server (SMTP)»Value mail.YOUR_DOMAIN
(in the example - mail.example.listkom.ru), otherwise you need to enter the name of the server where your domain is located (for example, msk147.site). To find out on which server your account is located, look at the address at which you enter the hosting control panel (it looks like https: //msk147..site).
The full name of the mailbox is used as a login (the field “ User"), Password (field" Password») You set when creating a mailbox in the hosting control panel.
After all the fields are filled in, you must click on the button " Additional settings»:
- In the window that opens, select the tab “ Outgoing mail server", Enable the option" SMTP Server Requires Authentication"And select the item" Same as server for incoming mail", Then click on the" OK "button:
- ATTENTION! If, when sending mail (for example, when testing the created account or later) you receive an error message like
The SMTP server returned an error. Account: " [email protected]", Server:" mail.example.listkom.ru ", Protocol: SMTP, Server response:" rblsmtpd: xx.xx.xx.xx pid xxxx: 451 http://www.spamhaus.org/query/bl?ip \u003d xx.xx.xx.xx ", Port: 25, Security (SSL): None, Error Code: 0x800CCC60 -
this means that your IP address has been listed by an independent anti-spam organization (spamhouse.org). In this case, on the tab “ Additionally»Change the SMTP server port from 25 to 587. This will not affect the security of your mailbox, but it will allow you to bypass some additional checks when sending mail:
- When you press the " Further»Testing the entered data:
- This completes the creation of an email account, and you have a test letter in your inbox: