For all practical purposes. For the theoretical side of the issue, see the article "FAT and NTFS: Advantages and Disadvantages".
Using NTFS
The NTFS file system should definitely be installed on system drives... In case of new windows versions (since XP) the system simply will not allow using anything other than NTFS on the system partition. NTFS is also the best choice for scratch disks, as well as for disks that store important data. In all these cases, the value of information is much higher than the cost of computing and disk resources spent on its storage.
It also makes sense to install NTFS on modern solid state drives (SSD) even though NTFS will reduce the effective life of such disks due to the many additional writes performed in the system transaction log. The reason is both the increased reliability of SSD disks in recent years in terms of MTBF and the value of your data in comparison with the cost of the disk itself (which is already low, and even constantly decreasing). The use of FAT on such disks is impractical due to the low reliability of data storage in this file system.
Using FAT
Using the FAT file system makes sense to format memory cards that will be used in devices such as mobile phones, digital cameras, tablets and audio players. All of these devices will not work with NTFS formatted cards, but FAT will be fine. Such memory card manufacturers as Transcend, Kingston use the FAT file system as a base.
The choice of file system is somewhat less obvious for devices such as USB flash drives. Modern flash drives (from Kingston, for example) are large enough to safely donate a part free space in favor of the transaction log, and are reliable enough to withstand the increased load without any harm. Accordingly, USB drives can be formatted to NTFS, provided that you intend to use them only with computers under windows management... If you have the slightest doubt about this, format the FAT.
FAT and NTFS reliability
NTFS is a much more reliable file system. Even at the design stage, mechanisms were built into it that allow an NTFS-formatted disk to work reliably and without failures under constant load conditions. Even if the recording operation is interrupted (for example, if during recording large file - or the simultaneous recording of many small ones, which is much worse - electricity will be lost), according to records from the transaction log nTFS system will be able to rollback all uncommitted transactions without damaging the hard disk file system. In a similar situation, FAT will behave in a completely unpredictable manner. You may be lucky, but you can get an unreadable partition on reboot, empty folders and "broken" files.
Recovering FAT and NTFS drives
So how do you recover your hard drive after deleting partitions and or formatting? Data recovery from damaged disks is possible both in the case of formatting FAT and NTFS. Moreover, if you wish, you can limit yourself to a single tool - such as Hetman Partition Recovery... The program is able to recover data from FAT and NTFS partitions, even if the partition has been damaged, formatted or cannot be read at all.
Using tools that work with one specific file system also makes sense: such programs are cheaper than their universal counterparts. For instance, Hetman FAT Recovery will recover files from a FAT formatted partition, no worse than a universal one Hetman Partition Recovery, while the cost will be less. Similar Hetman NTFS Recovery makes sense to use to recover data from NTFS partitions. If files need to be recovered from multiple devices or partitions formatted with different file systems - a universal solution in the form Hetman Partition Recovery will perfectly cope with this task.
If the flash drive is not formatted, what should I do in this case? Consider all possible options - from the simplest and most sparing method, to instructions on how to format a USB flash drive at a low level using a utility from Hewlett-Packard.
USB Flash Formatting Methods:
1.formatting usb media via Explorer;
2.formatting via JetFlash Recovery Tool;
3. recovery of the file system through AlcorMP;
4.Low-level formatting of a flash drive or memory card via HP USB Disk Storage Format Tool.
Formatting via Explorer.
1. Insert the USB stick into the USB port.
2. Go to My Computer and find the disk with the USB flash drive in the window that appears.
3. Click right mouse on the flash drive icon - Format.
4. At the next stage, it remains to select the file system for formatting. If the size of the flash drive is up to 2 GB, choose FAT32, if more than 2 GB, choose NTFS.
You can also specify a volume label. When everything is ready, click the "Start" button.
Wait until formatting is complete, after which the media is available in the list of drives.
This is the easiest way, it is suitable for cases when the file system is simply damaged, or you just need to clear the contents of the USB drive.
Formatting a USB flash drive via JetFlash Recovery Tool
1. Run the program for formatting flash drivesJetFlash Recovery Tool , we will use this program if the standard formatting does not work.
2. Connect your drive to the port.
3. Select it in the program window and click "Ok". No settings are required.
The program will format your device and fix any problems associated with it.
Recovering flash drives via AlcorMP
1. Run the program and then connect the media to the USB port.
2. Click the Start button in the main program menu and wait for the utility to format your drive.
The setup menu is only needed in difficult cases, at the initial stage there is no need for it - the program chooses standard cluster sizes.
Low-level formatting via
HP USB Disk Storage Format Tool.
1.In put the flash drive into the port of your computer or laptop and then run the utility.
2. Select the file system in which you want to format your flash drive, usually NTFS or FAT32 for small-volume usb-drives.
3. If the size of the media is determined correctly, then half the job has already been done! There are chances to restore the USB flash drive.
Important: check the "Quick Format" item when formatting for the first time. But if it fails, uncheck the box and repeat the process.
Click the Format button and wait until the procedure is complete.
Note: in case the formatting of the flash drive did not give results, in rare cases the EzRecover, Flashnul or Recover Disk applications from U-Storage ( in this case you may need the U-Storage driver).
These are professional utilities that require basic knowledge of file systems and the peculiarities of their work.
In some cases, by opening the USB drive, you can recognize the controller from the drawing and then determine the type of firmware, after which the manufacturer's utility for low-level formatting is selected.
When your memory card in the phone stops working it needs to be formatted. Just like a phone that does not work correctly, it needs to be reset. If you are thinking of selling your Android devicesoh and do not want your information to go along with the device, formatting the card will also come in handy.
Note: When you format your memory card, you will lose everything you have stored on it, including photos, music and other files. Make sure you create backup all your files.
There are many ways to format your memory card on a PC. This article will show you how to format a memory card on Android ..
Note: This article is suitable for Android devices with a memory card.
1. (Skip this step if your memory card is already in the phone) Insert the microSD card into the phone.
To insert a memory card into your phone, you first need to remove the back cover and remove the battery.
2. After you have inserted the SD card, go to "Menu -\u003e Settings -\u003e Storage" to access the storage settings.
3. Here you will see the "Format Card" option and the "Unmount Memory Card" option. To get started, just click on the first one, but if it is inactive, you need to click “Unmount SD Card” first.

4. When you press Format SD Card, you will be notified that all your data will be erased. Just click on "Format SD Card" and "Erase All" to finish.

After you have completed all these steps, you will receive a formatted SD card. The SD card will be formatted to FAT32.
Can a damaged memory card be formatted
Insert the memory card into the device, turn it on and then follow the instructions above. After formatting the memory card, error messages should no longer appear.
How to avoid damaging your memory card

There are quite a few things you can do to avoid errors or damage to your SD card. For example, it is not advised to remove the SD card when you are reading or when saving images and turning on / off the device, and not to change the memory card when the device is turned on.
AT latest versions Android introduced the function to remove the memory card for devices in which the memory card is removed without removing the battery.
Formatting a memory card on Android 6.0 Marshmallow

If you are one of those lucky ones who already use Android 6.0, you should know, when you insert a memory card into a device with Android 6.0, you will be prompted to choose where the memory from the SD card will belong, to the internal memory or our already familiar portable storage.
If you choose portable storage, the SD card will be treated the same as a removable disk. If you choose internal memory, then the SD card will be formatted and the device memory, and in this case the memory card will be summed up and the memory card will be encrypted.
conclusions
In this article, we learned how to format a memory card on Android correctly. Also, remember to back up your data before formatting the card. I hope this article was helpful to you. If you have any questions, ask them in the comments.
The need to format a memory card on Android does not arise so often, but sometimes you still need to perform this procedure. For instance, operating system may require formatting in case of errors in the file system.
If you are faced with a similar problem, then this article should help you. Here we will describe two ways to format memory cards at once.
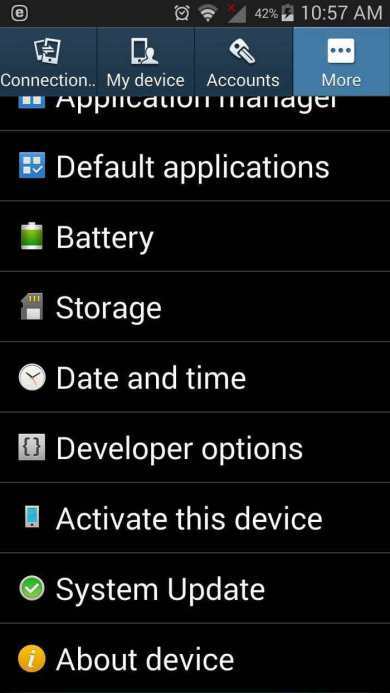
Step # 1. Open Android settings and go to the "Memory" section.
In order to format a memory card on Android, you first need to open the settings and find a section called "Memory" there. If you have a Samsung smartphone, then this section of settings will be located on the "Options" tab.

Step # 2. Open the "Format SD Card" subsection.

Step # 3. Format the memory card on Android.
Now you just have to click on the button "Format SD memory card". After pressing this button, the system formats your memory card by deleting all data from it.

In some cases, Android may require you to disconnect the memory card before formatting. In this case, return to the previous window and click there, on the "Disconnect memory card" button.

After disconnecting the memory card, try formatting the memory card again. Most likely, this time everything will go well.
Formatting a memory card via a computer
It should be added that you are not required to format the memory card through the Android device. Instead, you can format the memory card using your computer or laptop.
To do this, you need a computer or laptop with a card reader. If there is no built-in card reader, then you can use an external card reader that connects via USB. You will also need a MicroSD to SD (large memory card) adapter. Such adapters are usually supplied with the memory card itself. If all this is there, then you can proceed.
Step # 1. Insert the MicroSD card into the SD adapter.
To get started, simply insert the MicroSD memory card into the SD adapter. It's easy enough to do MicroSD card fits into the adapter without any resistance.

Step # 2. Make sure the adapter is write enabled.
There is a switch on the SD adapter that you can use to enable or disable writing to the memory card. In order to format the memory card, the switch must be in the up position.

Step # 3. Insert the memory card into the card reader.
After that, insert the memory card into the card reader so that the sticker on the memory card is facing upwards, into the cut corner on the memory card is on the right.